Unit 2: Illustration and Animation
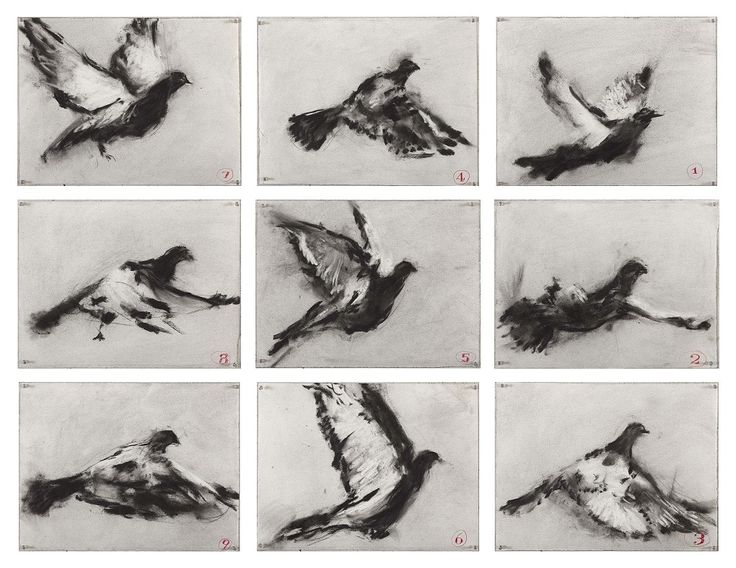
Our visiting artist: Marty Cooper
A quick history of Illustration
Steven Guarnaccia, Professor, Illustration Program at The New School
Yuko Shimisu, http://yukoart.com/
Sean Murphy, http://seangordonmurphy.com/
Molly Crabapple, http://mollycrabapple.com/
Yuko Shimisu, http://yukoart.com/
Sean Murphy, http://seangordonmurphy.com/
Molly Crabapple, http://mollycrabapple.com/
Illustrator and author Shaun Tan's Academy Award winning short animated film, 'The Lost Thing'
|
|
|
After watching the movie:
1. In your opinion, what's the meaning of this story? What's the message? How is this expressed in this short film?
2. The boy is the only person who notices the Lost Thing. What does this tell you about the world where the story takes place?
3. Think about the meaning of dystopia and utopia. How do these terms relate to this short film?
A utopia is a perfect world. In utopias, there are not problems like war, disease, poverty, oppression, discrimination, inequality, and so forth. The word 'utopia' was made up from Greek roots by Sir Thomas More. In 1516, More wrote a book called Utopia. Depending on the Greek roots used, utopia can either mean 'no place' or 'good place.'
A dystopia, on the other hand, is a world in which nothing is perfect. The problems that plague our world are often even more extreme in dystopias. Dystopia is a play on the made-up word 'utopia' using the root 'dys,' which means 'bad or difficult.' Words like 'dysfunctional' or 'dyslexia' illustrate the use of this prefix.
4. Respond to the look and visual style of the animation. Describe the different visual elements used to represent the boy’s world and the world of lost things. Why do you think these two places are depicted in the way they are?
FLIP BOOK ANIMATION project
inspired by South African artist, William Kentridge
|
|
|
Illustration Unit Studio Outcome
-You will create a flip book animation having at least 50 photo frames that will be strung together in a video using imovie.
-You are encouraged to use the drawing and painting media of your choice for this project.
(WET: Chinese ink, acrylic paint; DRY: white and black charcoal, pens of all kinds, crayons, oil pastels)
-You are welcome to incorporate collage elements (magazine images, images from online or cut paper).
The collage aspect will cut down on drawing time and allow some room for imaginative play.
-You are encouraged to use imaginative/free drawing in this assignment, rather than realistic observational drawing. You may use a combination of both if you would like....this is up to your discretion.
-This animation may be abstract and based on the formal elements to tell a STORY. It could be as simple as the story of a little dot that goes on a journey up a hill, or a sock that slithers across the pages of the book. Keep it simple.
-Design Principles:
-Your animation should show MOVEMENT and some sort of transformation.
-EMPHASIS should be on your main subject....maybe the main thing changes as the story goes on. How will you create emphasis? Emphasis through color, through shape, through contrast, through detail?
-You may keep your drawings in black and white, or incorporate color, but if you use color, you must have a limited color scheme (black and white and 3 colors MAX). This is to help you create UNITY in your animation.
Examples of Flipbook animation
|
Flipbook Animation - Water from Sophie Li on Vimeo. |
STEPS
Part A: Preparation and Planning
Part B: Drawing on 40-50 pages
Part C: Taking Photos and Editing
Part D: Imovie and GIF creation
PART A and B:
1. Choose an old book and write your name and class on the inside cover. This is your book! Keep it in your art drawer.
2. Tear out 2-3 pages and experiment with a variety of DRY and WET MEDIA as well as COLLAGE (cut paper or magazine) Experimenting does not mean just slopping paint around...it means you are trying to create some unique textures or effects by having more than 1 medium on the page.
3. Mindmap 3 or more story ideas. Start simple, like with a single shape (example:a square that rolls and turns into a circle...)
Your story must have a clear beginning, movement and/or transformation, and end.
4. Share your 3 story ideas with 2 other classmates. These 3 ideas should be written down in your sketchbook. Be very clear about the beginning, the movement/transformation and the end.
Group mates should comment on:
-does it satisfy the criteria of the flip book story?
-is too complex for 50 drawing frames? if so, how to SIMPLIFY?
5. When you have chosen the story you will use for this project, complete a Storyboard sheet. You will draw out your Key Frames (example link) on this sheet. Key Frames are the MAIN FRAMES in your story.
You may draw whatever you like using whatever materials you like as long as there is a clear beginning, movement and/or transformation, and end.
-You should incorporate some sort of ZOOMing IN or ZOOMing OUT in your storyboard plan.
-Think about your POINT OF VIEW.
-Use your previous knowledge of positive and negative space.
6. Choose 1 key frame to develop as a FINAL PLAN on book paper.
-fully developed in the media you will use for all your frames.
-pasted in your sketchbook.
7. Begin your 50 pages. You may use shortcuts, like making a stencil for a silhouette you will use multiple times, or photocopy an image that you will need to use more than once. Think through your steps to see what shortcuts you can take.
All drawings are due at the beginning of class on Friday, October .
|

|
PART C and D
Part C: Taking Photos and Editing Photos
Part D: imovie and GIF creation
C. Taking photos of your work:
-You may use your phone (if your phone has a good quality camera on it). Make sure your camera is on a stable surface and each page is taken in the same location, same angle, same lighting.
This will help create FLUIDITY and UNITY in your images.
-there are 2 ipads set up in the room for you to use, with tape markers to help keep each of the book pages in the same place. After taking photos of your work, airdrop the photos to your laptop.
Editing your photos with PICASA or PHOTOS (PHOTOS is the updated iphoto):
Main things to do in editing:
1. CROP (cut out all unimportant visual info, like tape and table)
2. Adjust EXPOSURE and/or CONTRAST (you may find you don't need to do this if your photos are bright enough)
Below is an unedited photo on the LEFT and an edited photo on the RIGHT.
|

|
-If you have to do any image flipping or image editing that requires selecting and pasting, use PHOTOSHOP.
* Please come afterschool or ask me during class if you need some Photoshop tips. I'm happy to help you get started.
D. IMOVIE AND GIF CREATION
After all your photos have been edited, you're ready to import them into imovie.
Use Command+A to select all your edited photos and drop them right into imovie into a new project.
A couple things to do when all your photos are selected.
-Change frame rate to 0.1 or 0.2.
-Remove the Ken Burns panning effect, so select 'Fill'
Optional: Add a song as a soundtrack to your video, select Tunes in imovie and it will search for songs on your laptop. Your video will probably not exceed 10 seconds so keep this in mind.
Uploading your video on Youtube (you must have a google/gmail account before this step)
in imovie, go to File-Share-Youtube
Share as LARGE size video
It will automatically upload to Youtube
To turn it into a GIF:
Copy the video URL of the Youtube video, then upload onto the giphy site.
You will have a GIF of your video!
Embed your Youtube video AND your GIF onto your Tumblr Site.
Eric Drooker- Cartoonist and Illustrator
The artist Eric Drooker is probably best known for paintings that have appeared on many New Yorker magazine covers since 1994. Those covers, which often portray Drooker's native Manhattan in all it's wonder, humor, and menace, reflect his deep love of the city he began exploring as a boy.
Go to Eric Drooker's website to see some of his work.
Go to Eric Drooker's website to see some of his work.
http://content.photojojo.com/tutorials/stop-motion-digital-camera/
http://content.photojojo.com/diy/photoshop-photo-flipbook/
https://en.wikiversity.org/wiki/Storyboard_Artwork_Project/Thumbnail
http://content.photojojo.com/diy/photoshop-photo-flipbook/
https://en.wikiversity.org/wiki/Storyboard_Artwork_Project/Thumbnail