Assignments 2017-2018 |
ISB Blog list:
1. Fast/Slow Drawing Reflection 2. You are what you wear Reflection 3. In a Box Reflection _____ S2______ 4. PS Media Testing #1-Fruitface 5. PS Media Testing #2-Kaleidoscope 6. PS Media Testing #3- Geometric Reflections (2) 7. PS Media Testing #4-Double Exposure (2) 8. PS Media Testing #5 Inception Effect 9. Valentine's Card blog post 10. Art Documentary Blog Post 11. Converging Cultures Reflection Blog Post ___________________ 12. Spring Fair Logo Design post 13. Spring Break HW post 14. Portrait Media Testing-Oil Painting Reflection 15. Portrait Media Testing-Acrylic Painting Reflection 16. 2 Painting Analyses 17. Portraiture Reflections Blog Post |
Sketchbook Assignment list:
1. Time capsule 2. 1 object/9 times 3. Composition still life 4. Charcoal Value Scale 5. Egg Drawing-photo 6. Composition sketches of still life clothes 7. Original Butterfly 8. Post it notes-feedback 9. Magazine Cutout Drawing 10. Feet drawing 11. Stippling Money 12. Ideaweb-Theme 13. Word-Image List 14. Final Plan/Composition Sketches _____ S2______ 15. Metamorphosis 16. Idea web-Culture 17. Initial Ideas-3 sketches _______________ 18. Facial Proportions-photocopy 19. Face Drawing following facial proportions 20. Color Theory Notes 21. Inspiration Page 22. Composition sketches 23. Final Plan |
SEMESTER 2
Due Friday, May 25-FINAL PORTRAIT REFLECTION

- Your final reflection will be posted as a Blog Post on your ISB blog.
- Your Blog title should be 'Portraiture-"Your Personal Title "'
- You should tag your work under ART 1 or make sure it is nested under the Art 1 category on your blog.
- You should organize your writing into paragraphs.
Photos you need on this blog post:
1. Completed painting photo
2. Final Plan photo
3. 4 Process Photos (choose any 4 that best show the progression of your painting)
4. Artist habit of mind 1-photo
5. Artist habit of mind 2-photo
6. Artist habit of mind 3-photo
PART 1: Answer the 4 Introductory prompts at the beginning of your reflection:
Part 1 and Part 2 of the questions below will be printed out to accompany your painting when it is on display.
Your accompanying Artist Statement should:
-fit on 1 side of A4 paper
-paragraph format addressing questions below in complete sentences.
-have your title at the top center
-full name
1--Introduce the project: Describe the painting challenge: what were you asked to do for this studio project?
What media were you working with?
2a--Formal analysis/Message--
What is the meaning of the title of your painting?
Who is the subject in your painting and why did you choose this person?
Which guiding question(s) are you addressing and how are you addressing them in this work?
Explain how the visual elements supports your intended message about the person or what they represent. What, if any, symbolic imagery did you include and how does it support your artistic intentions?
What is the mood of your painting and how did you use a specific color palette to create this mood?
2b--Artist influence: Who inspired you in this project? What have you "borrowed" from studying their work/style/technique?
3--Summarize the creative process of making this work. Did your actual studio piece end up looking differently than you had envisioned in your final plan? What challenges came up for you in this project? How did you address these challenges?
4--Effort and Artistic Growth: Did you challenge yourself to try out new ideas and techniques in this project? Did you apply yourself to make your best work? Did you take advantage of class time? Looking at your completed work, do you think you've grown. stretched creatively and matured as an artist? Explain how and be specific.
|
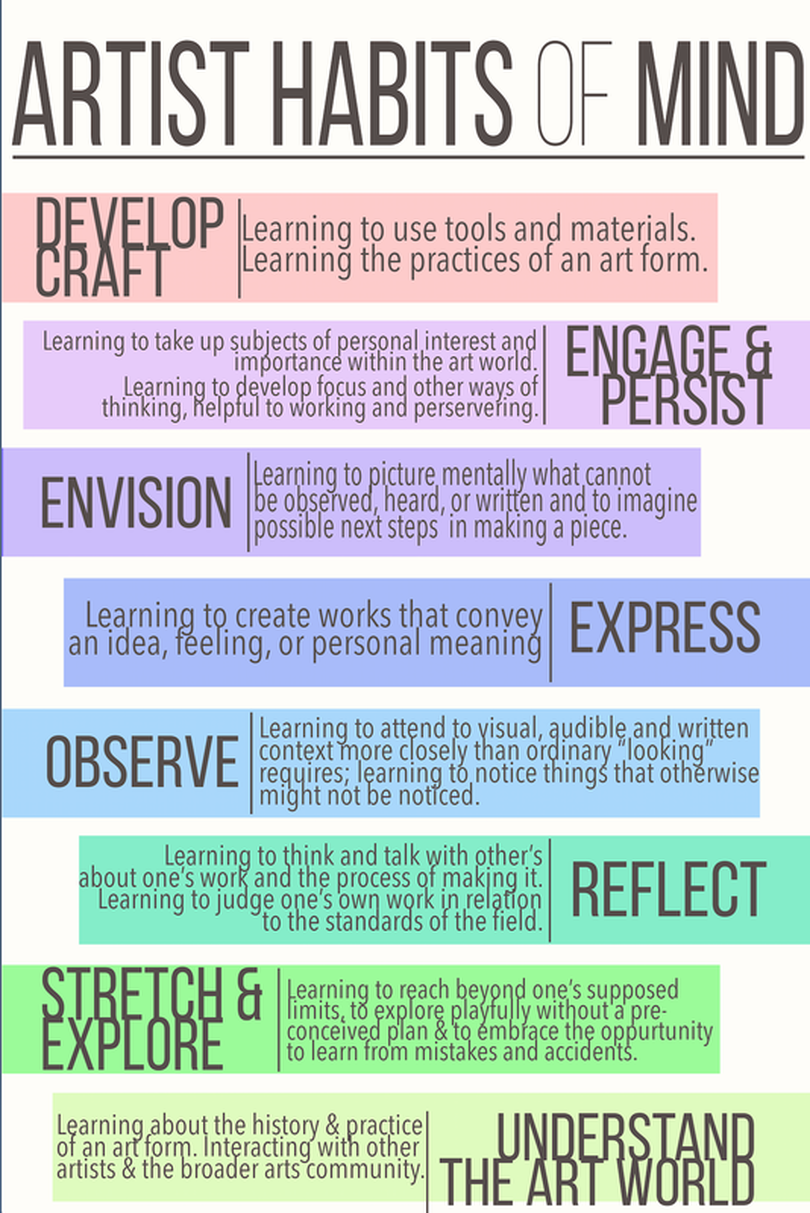
PART 2: Choose 3 Artist Habits of Mind (that are DIFFERENT from the ones you chose in the CONVERGING CULTURES project) and address them with written and visual evidence. Look at the Poster on the right, and check your previous reflections to make sure you don't repeat any.
For each of the 3 artist habits of mind, you should:
|
|
Starting the Portrait Painting Project...
Reminders:
-WRITE NAME IN PERMANENT MARKER on the back of your canvas (on wood)
-UNDERPAINTING?
-USE PROJECTOR TO TRACE PHOTO (2:IN CLASSROOM AND IN GALLERY)
-IF YOUR CANVAS IS LOOSE, YOU CAN USE WATERED DOWN GESSO ON THE BACK OF YOUR CANVAS TO TIGHTEN IT.
-TAKE PROCESS PHOTOS EVERY SINGLE STUDIO SESSION TO TRACK THE DEVELOPMENT OF YOUR WORK
-Use your reference photo at all times!
-Oil painters: Use the lid covered palettes (blue plastic lid) to keep your paints moist and protected
-If you need to get messy (splatters of paint or drips with spray bottle) please work OUTSIDE!
Before you begin, check that you have:
- Completed FINAL PLAN with FEEDBACK from group members
- Reference photos of your model/you (show me on your laptop)
- Edited final reference photo-COLOR and COMPOSITION (cropped to fit the size of your canvas) and any other Photoshop effects (show me on your laptop)
- Possible UNDERPAINTING? Watch the video below to understand the purpose of doing an underpainting. I would do this in acrylic paint mixed with water and acrylic thinner medium.
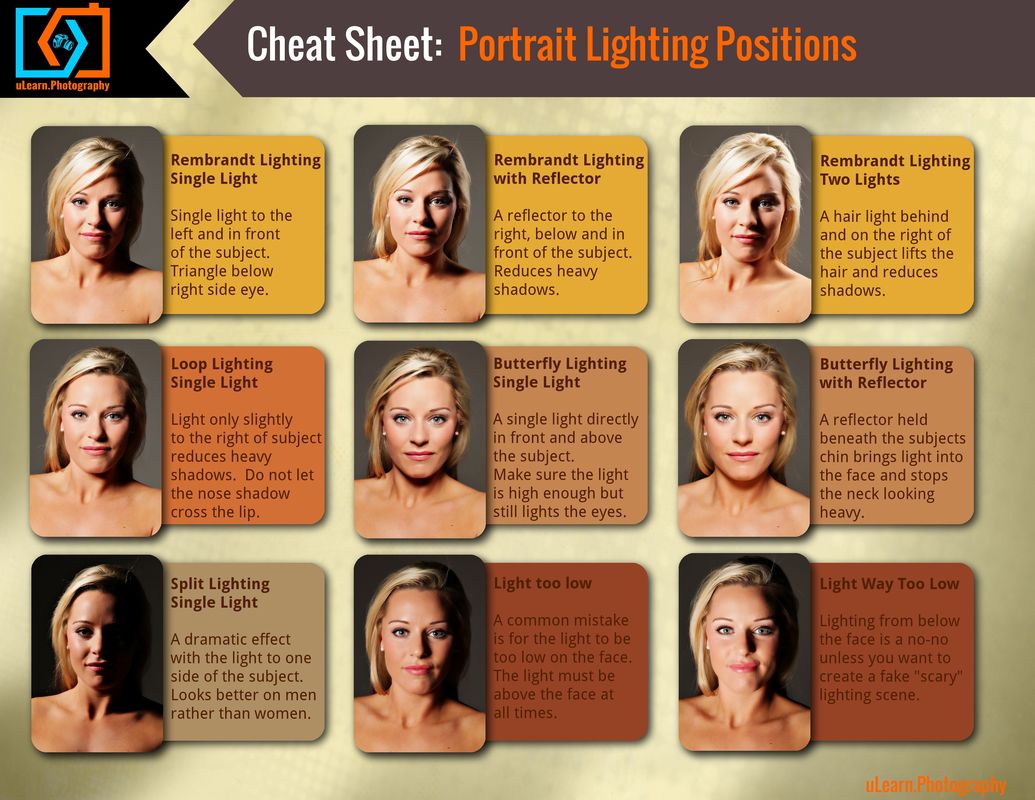
REFERENCE PHOTOS-LIGHTING
Look at your inspiration painting portraits to study the lighting in the work.
-Where is the light source?
-How does it create the mood of the work?
Optional: Media testing with modeling paste, only if you would like to apply texture to your painting.
Video on L-Start at 1:20 to see the artist apply modeling paste with a palette knife.
|
|
|
|
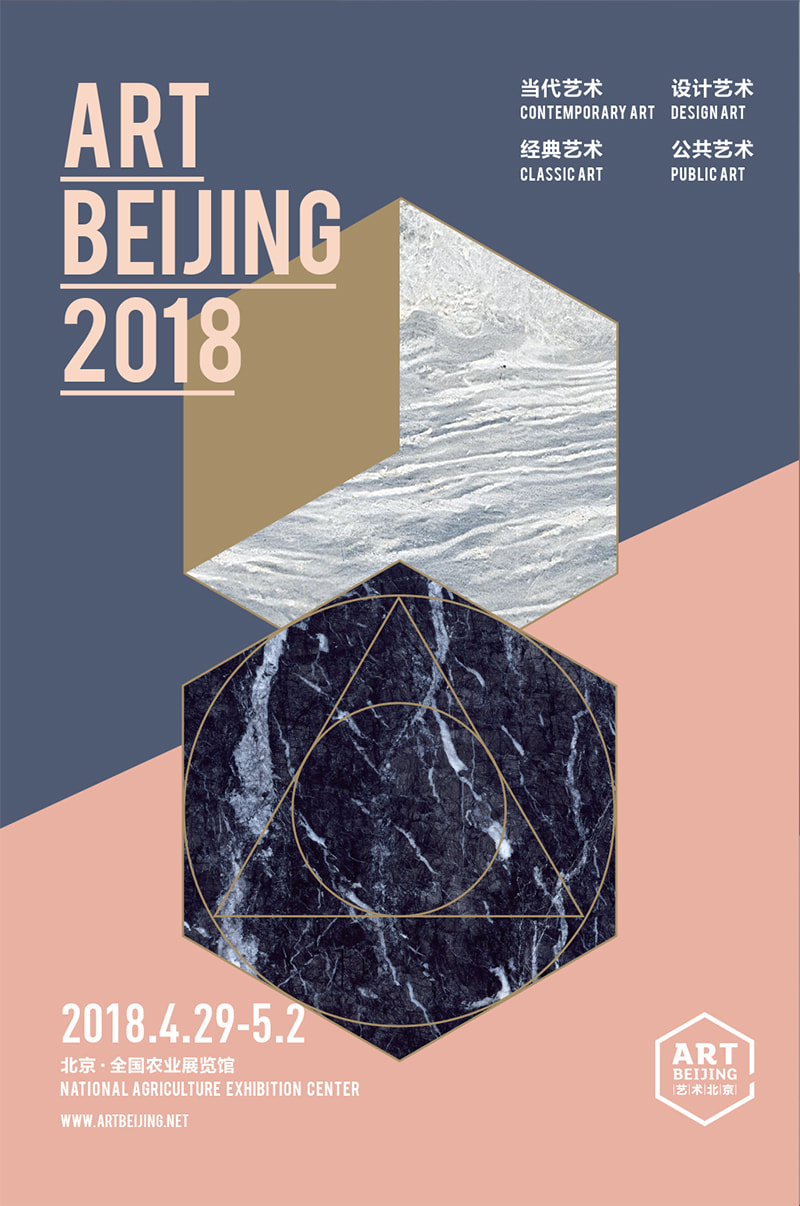
ART Beijing 2018 Expo @ the Agricultural Exhibition Center-4/29-5/2Details HERE
|
Monday April 23/Tues April 24-Inspiration page/Composition thumbnails and FINAL PLAN
|
We will begin our sketchbook development on Monday/Tuesday (as this weekend is a no HW weekend).
STEPS for FINAL PLAN: 1. INSPIRATION PAGE
|
|
2. COMPOSITION PLANNING/REFERENCE PHOTOS of subject
- -You will create a page of 4 compositions considering the canvases we have available for you to use. Each composition should show positive/negative space. You should have a reference photo that you feel will support your intended portrait message.
|
|
3. FINAL PLAN
|
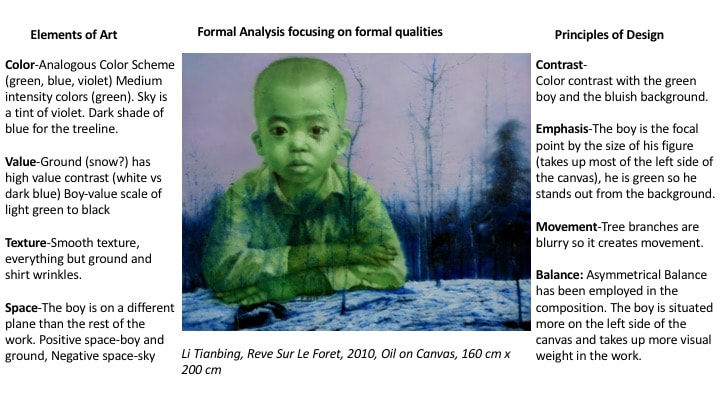
Due Thursday April 19/Friday April 20-Analysis of 2 artworks
Continue your art analysis that we started in class today.
Choose 2 artworks by artists whose work you are drawn to. Look at the list of artists on the PORTRAITS page. Select artists where you are drawn to their style or their approach. There are so many amazing portrait painters to choose from. Hopefully 1 of the artists you choose will be someone whose style influences your own project.
Choose at least 3 elements and 3 principles to focus on the painting you selected. Attempt to use descriptive vocabulary pertaining to the elements and principles you selected.
Wed April 18/Thurs April 19-Acrylic Painting Media Testing Blog Post Reflection
Blog Post on Acrylic Painting Media Testing
Take a photo of your acrylic painting portrait to accompany your media testing reflection.
-Answer the prompts below:
--What were the steps of this media testing? Explain each step.
--What new things (concepts and/or skills) did you learn about how to properly use acrylic paint and care for the materials ?
--What did you using acrylic paint as a media?
--What was frustrating about acrylic painting? How could you deal with this problem if you were to use acrylic paints in the future?
--What questions do you have about using acrylic paint? Are there certain techniques you want to learn how to do? Reference an artist who works in acrylic regarding the technique you want to learn if you can.
Happy Spring Break! Fun Holiday Homework!
You have 2 choices. You must choose 1. Or if you are an art star, do them both! :)
CHOICE 1. Go see some ART! Go to a gallery, an art museum, or any art exhibition! Take a few photos and READ the Curator's intro to the show (you can learn a lot). Photos of what you saw at the show and your short reflection on the work will be evidence of your visit. What was the theme of the show? What media? What genre of art? Who were the artists? Where did you go? What did you notice about the artwork in terms of the formal qualities? How did the formal qualities of the work support the theme/message?
Parkview Green Mall (CBD)-Artwork all over with gallery on 10th floor
Time out Beijing-Art Exhibitions
OR
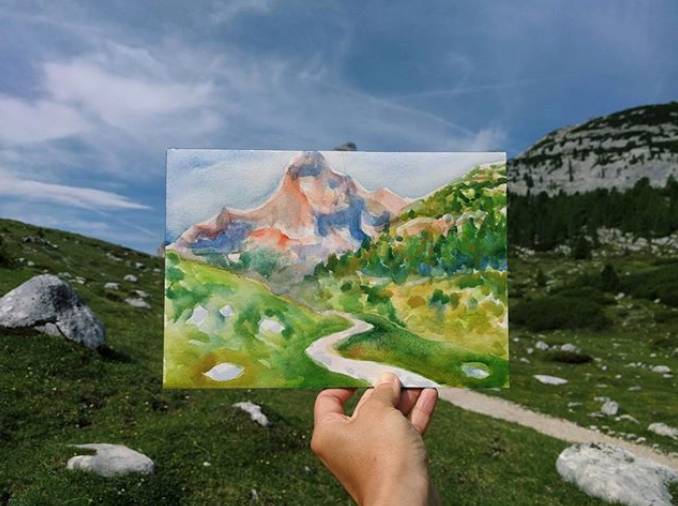
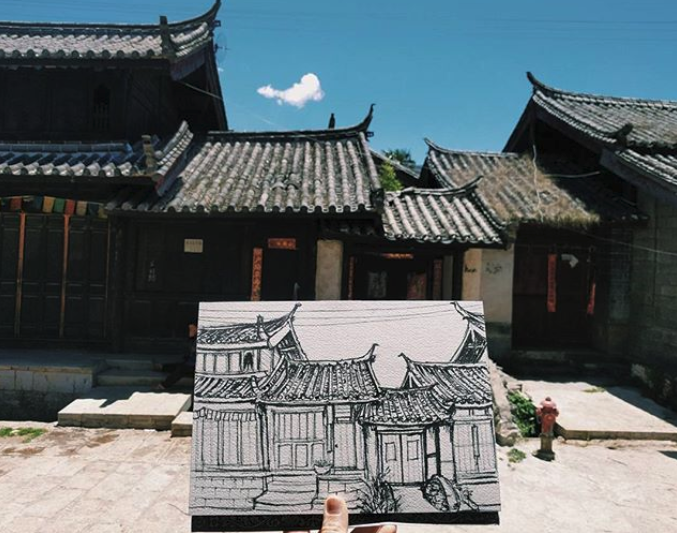
CHOICE 2. Do a sketch ON LOCATION. This is really fun! It will take you at least 1 hour. You can do this in color, or just in black pen, up to you. Sketch what you see in pencil first if it's intimidating. But enjoy drawing from observation...it truly is a meditative experience and trains your eyes to look at the details! Take a photo of your hand holding your sketch in the location as evidence.
CHOICE 1. Go see some ART! Go to a gallery, an art museum, or any art exhibition! Take a few photos and READ the Curator's intro to the show (you can learn a lot). Photos of what you saw at the show and your short reflection on the work will be evidence of your visit. What was the theme of the show? What media? What genre of art? Who were the artists? Where did you go? What did you notice about the artwork in terms of the formal qualities? How did the formal qualities of the work support the theme/message?
Parkview Green Mall (CBD)-Artwork all over with gallery on 10th floor
Time out Beijing-Art Exhibitions
OR
CHOICE 2. Do a sketch ON LOCATION. This is really fun! It will take you at least 1 hour. You can do this in color, or just in black pen, up to you. Sketch what you see in pencil first if it's intimidating. But enjoy drawing from observation...it truly is a meditative experience and trains your eyes to look at the details! Take a photo of your hand holding your sketch in the location as evidence.
|
|
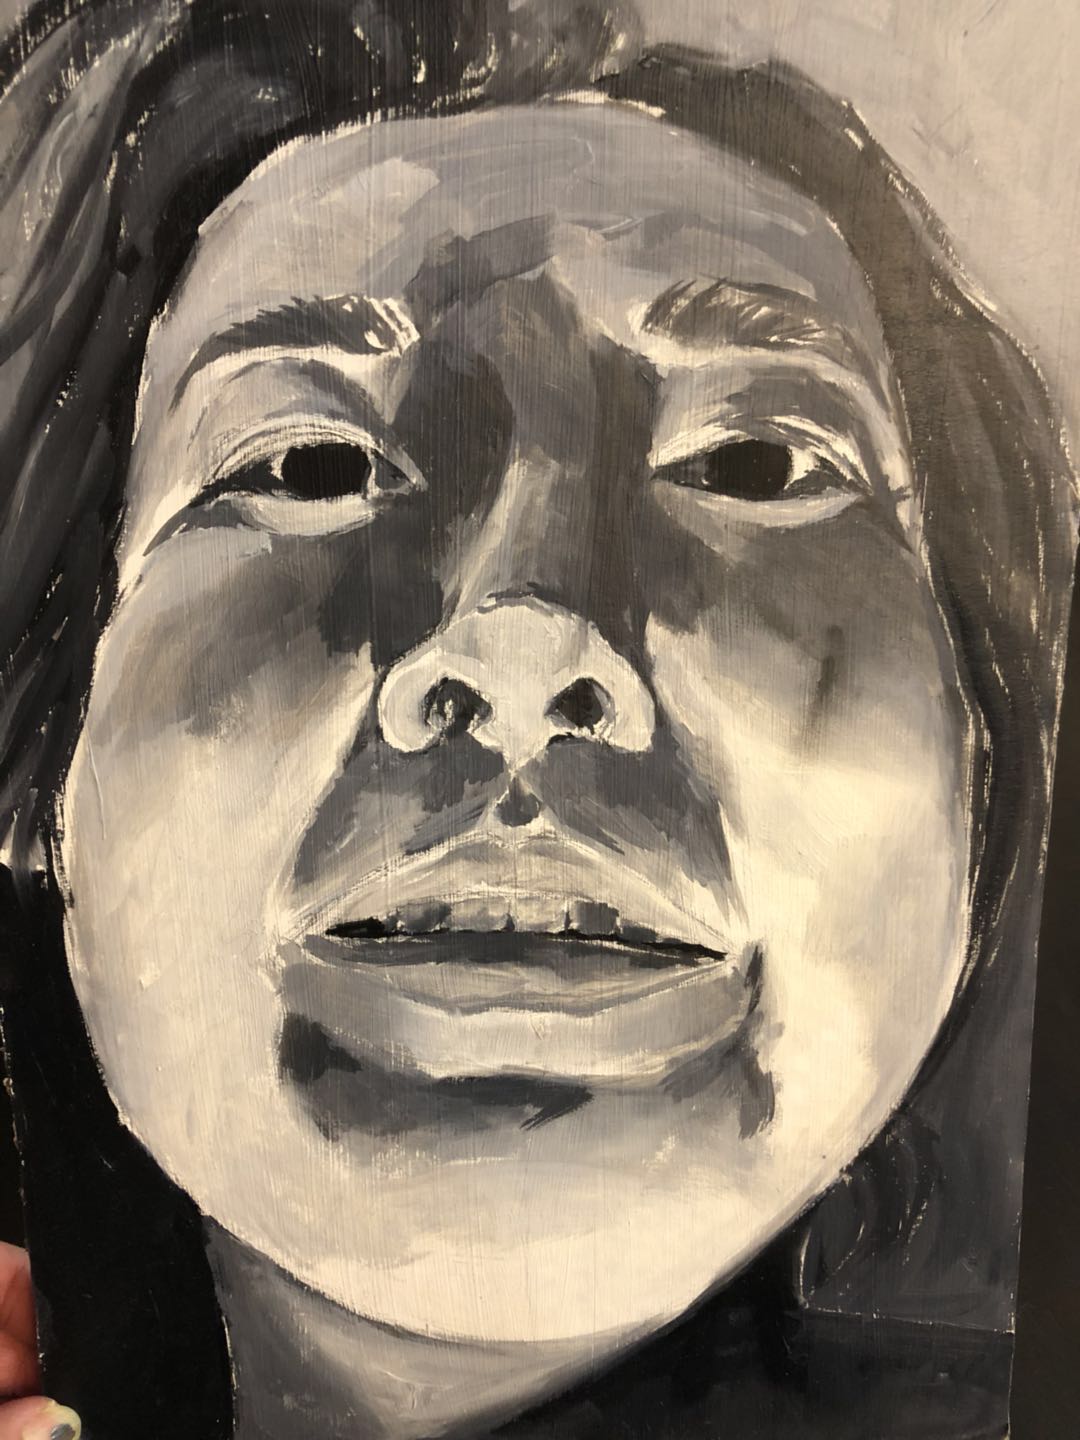
Oil Painting Media Testing Blog Post Reflection
Blog Post on Oil Painting Media Testing
Take a photo of your oil painting portrait to accompany your media testing reflection.
-Answer the prompts below:
--What were the steps of this media testing (taking a photo, gridding, drawing, painting)? Explain each step.
--What new things did you learn about how to properly use oil paint and care for the materials ?
--What did you enjoy about the quality of oil paints as a media and what it allows you to do with painting?
--What was frustrating about oil painting? How could you deal with this problem if you were to use oil paints in the future?
--What questions do you have about using oil paint? Are there certain techniques you want to learn how to do? Reference an artist who works in oil regarding the technique you want to learn if you can.
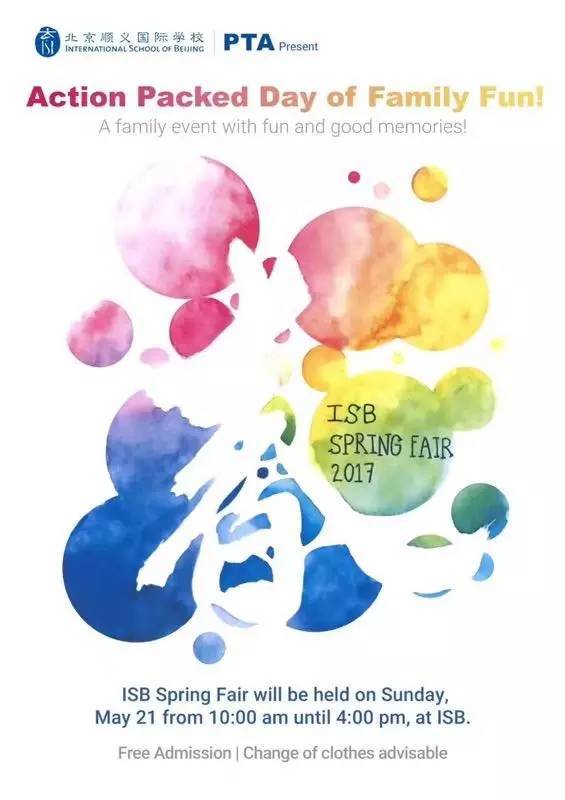
Long Weekend HW-Spring Fair Logo!
Due Wed/Thurs, March 28/29
|
Who: Open to all current ISB students, each student may make ONE submission.
You may do this Spring Fair logo in ANY MEDIA you choose. What:
|

|
Due March 22/23-Sketchbook Assignment-Made up Face based on Facial Proportions
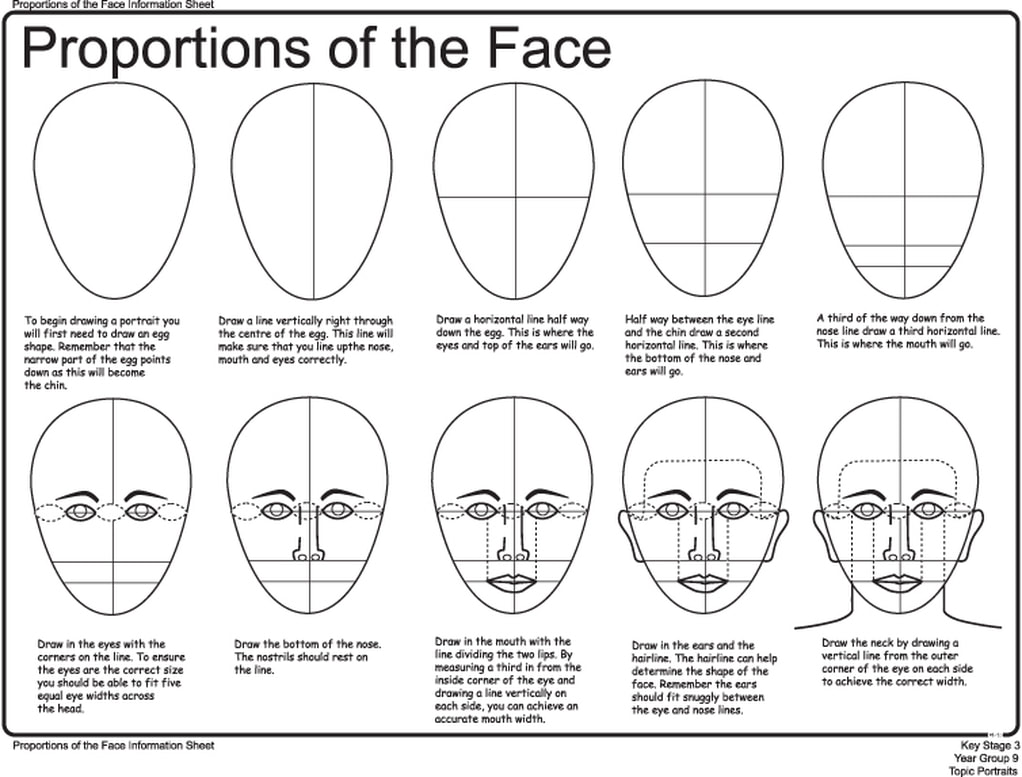
Follow the slideshow directions step by step below.
Work with an HB pencil and a ruler. Draw your facial proportion lines LIGHTLY on the paper.
You may use a 2B pencil for shading.
Work with an HB pencil and a ruler. Draw your facial proportion lines LIGHTLY on the paper.
You may use a 2B pencil for shading.

|

|
|
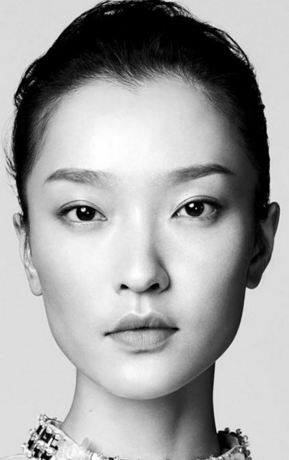
March 12/13-Monday/Tuesday-Bring in Selfie for Media Testing
|
Bring in 4 different selfies photos-this will be for media testing in our next unit. Make sure there is a clear light source so you get an array of values (and contrast) on your face. Get close to your face.
You will choose 1 favorite out of your 4 and edit it to make it Black and White. Your face should fill the photo, so you may need to crop it to make your face fill most of the frame. You will print it on A4 paper and we will begin our media testing with oil paint. |
|
Due March 12-Monday-Final Reflection
Photos you need on this blog post: 1. Completed project photo 2. Final Plan photo(s) 3. Process Photo-1, 2, 3 4. Artist habit of mind 1-photo 5. Artist habit of mind 2-photo 6. Artist habit of mind 3-photo PART 1: Answer the 4 Introductory prompts at the beginning of your reflection: 1--Introduce the project: Describe the studio challenge. What were you asked to do for this project? What media were you working with? 2--Formal analysis/Message--What is the meaning of your title in relation to your piece? If you did a series of composite images, how are they related to each other? Explain how the visual subject matter in your work supports the message you intended to convey. What visual symbols did you include and what do they represent in terms of the relationship you have with the culture(s) you are a part of? If you chose another person as your subject, explain the story of their culture related to your creative decision making. -Surreal Devices: What surreal devices did you use and how are they used in your work? -Artist influence: Who inspired you in this project? What have you "borrowed" from studying their work and style? 3--Summarize the creative process of making this work. Did your actual studio piece end up looking differently than you had envisioned in your final plan? What challenges came up for you in this project? How did you address these challenges? 4--Effort and Artistic Growth: Did you challenge yourself to try out new ideas and techniques in this project? Did you apply yourself to make your best work? Did you take advantage of class time? Looking at your completed work, do you think you've grown and matured as an artist? Explain how and be specific. PART 2: Choose 3 Artist Habits of Mind (that are DIFFERENT from the ones you chose in the BOX project) and address them with written and visual evidence. Look at the Poster on the right, and check your previous reflections to make sure you don't repeat any. For each of the 3 artist habits of mind, you should:
|

|
March 6/7-Tuesday/Wednesday-FINAL Converging Cultures Digital Composite due
Come to class with your Photoshop project complete. I will collect your files and send them to the printers.
Due Wed/Thurs, Feb 28/March 1-Documentary Review Blog Post
Write in paragraph format and in complete sentences.
Necessary prompts for your blog post:
Give us a brief synopsis of the documentary you chose to watch IN YOUR OWN WORDS.
What new ideas or understandings did this documentary shed light on for you in terms of the workings of the contemporary art world? Please explain in detail.
What is an issue brought up in the documentary that you STRONGLY AGREE OR DISAGREE with? Explain the issue and give us reasoning as to why you agree or disagree with it.
What’s the most important takeaway from watching this documentary? What will you remember about it moving forward?
Converging Cultures Starter Check:-Composition artist influence? Who and how is this influence shown in your work?
-SIZE of canvas-50 cm minimum, 300 px/inch -Focal point, emphasis? Is anything else competing for visual attention? How can you change this? -Compositional movement? How do your eyes move through the composition? -2 primary photos? High resolution? -Secondary photos? High resolution? |
Checklist for FINAL PLAN:
-How are 2 cultures (or more than 2) coming together in your work? -What 2 SURREAL DEVICES do you think you will you use in your work? -What PRIMARY source photos are you using? You should use a couple. -What are some MAIN SUBJECTS/OBJECTS of imagery in your work? What do they SYMBOLIZE? - What is the MESSAGE of your work? This should be tied to the symbolism of your chosen subject matter. -Do you have a FOCAL POINT? How are you creating visual importance on this area of your composition? -What will UNIFY your collage? What will you do to bring all elements together to create a cohesive collage? -How have you considered BALANCE in your composition? How? Explain. -Out of the SURREALIST ARTISTS we have looked at, whose work are you most drawn to and inspired by? How will you "borrow" some of their compositional layouts/ideas/techniques in your own work? -In terms of collecting SECONDARY source photos, how are you doing? Do you have enough HIGH RESOLUTION photos you’ve collected to use? Flickr, 500px |
CNY Homework-Watch an art documentary
Below are the art documentaries you can choose from. Ms Z will airdrop the video file to you.
|
|
|
|
|
Valentine's Day is Wednesday (Feb 14)!!!!
HW is to create a small and cute Valentine's card for a friend or a special person in your life. Valentine's day is not only for couples but for showing your friends they are loved and special.
Your challenge is to create a UNIQUE and CREATIVE Valentine's card design. This can be digitally made OR handmade...up to you!
I recommend limiting your color scheme to no more than 4 colors and black!
Think about what would be amusing to your friend. How can your design make them laugh? How can you infuse teenage humor into your design? Even an inside joke???!
Take a photo of your card design and UPLOAD it to your blog. Use the prompts below to write up a short description of your card design and how you came up with it.
Below are some of my favorite creative Valentine's cards by designer and illustrator Emily McDowell. She has such a great sense of humor in her card designs.
HW is to create a small and cute Valentine's card for a friend or a special person in your life. Valentine's day is not only for couples but for showing your friends they are loved and special.
Your challenge is to create a UNIQUE and CREATIVE Valentine's card design. This can be digitally made OR handmade...up to you!
I recommend limiting your color scheme to no more than 4 colors and black!
Think about what would be amusing to your friend. How can your design make them laugh? How can you infuse teenage humor into your design? Even an inside joke???!
Take a photo of your card design and UPLOAD it to your blog. Use the prompts below to write up a short description of your card design and how you came up with it.
- Who is this card intended for? Why is this person special to you?
- What elements of art/principles of design guided you when putting together your card design
- What is the intention of your card's message?
- How were you CREATIVE in your card design? Explain.
- Is humor involved in your design? If so, how?
Below are some of my favorite creative Valentine's cards by designer and illustrator Emily McDowell. She has such a great sense of humor in her card designs.
Photoshop Tutorials to try-Watch the first tutorial in the upper left corner 'The 3 easiest ways to cut out images' and then choose one of the other 3 tutorials to follow. All these tools will be useful for your composite image or image series.
|
|
|
|
|
|
Feb 5-9
FINAL PLAN
Final Plan for Converging Cultures Project-1 page in sketchbook write up with a couple previous composition sketches. Checklist for FINAL PLAN:
-What is the message of your work? How are 2 cultures (or more than 2) coming together in your work?
-What 2 SURREAL DEVICES will you use in your work? Name them and explain how they are being used?
-What PRIMARY source photos are you using? You should use at least 2
-In terms of collecting SECONDARY source photos, how are you doing? Do you have enough HI RESOLUTION background photos to use?
-What's some of the imagery in your work? What do they SYMBOLIZE or REPRESENT?
-Out of the surrealist photographers/painters we have looked at, whose work are you most drawn to and inspired by? How will you "borrow" some of their ideas/techniques/compositional layouts in your own work?
Monday/Tuesday
No Homework weekend BUT please come prepared to take photos in the photo studio!
Initial Idea Sketches
Do 3 initial idea sketches (5 minutes each). Make sure to draw a square or rectangular frame before you begin sketching out your composition. You should be thinking about WHICH artist is your compositional inspiration and look at their organization of space while you sketch out your ideas.
Make sure to include the following in each of your 3 sketches:
-conveying culture
-sentimental message
-2 surreal devices
Jan 29-Feb 2
Lets go over Primary and Secondary source images
Resources for Secondary Source Images-LINK
FRIDAY-primary photo shoot in the studio: can be of a person or of objects that you may include in your composite.
Resources for Secondary Source Images-LINK
FRIDAY-primary photo shoot in the studio: can be of a person or of objects that you may include in your composite.
Jan 22-26
Due Monday/Tuesday-HOMEWORK (because of missing class for One Acts):
1. Videos and written response
2. Inception Photoshop Tutorial
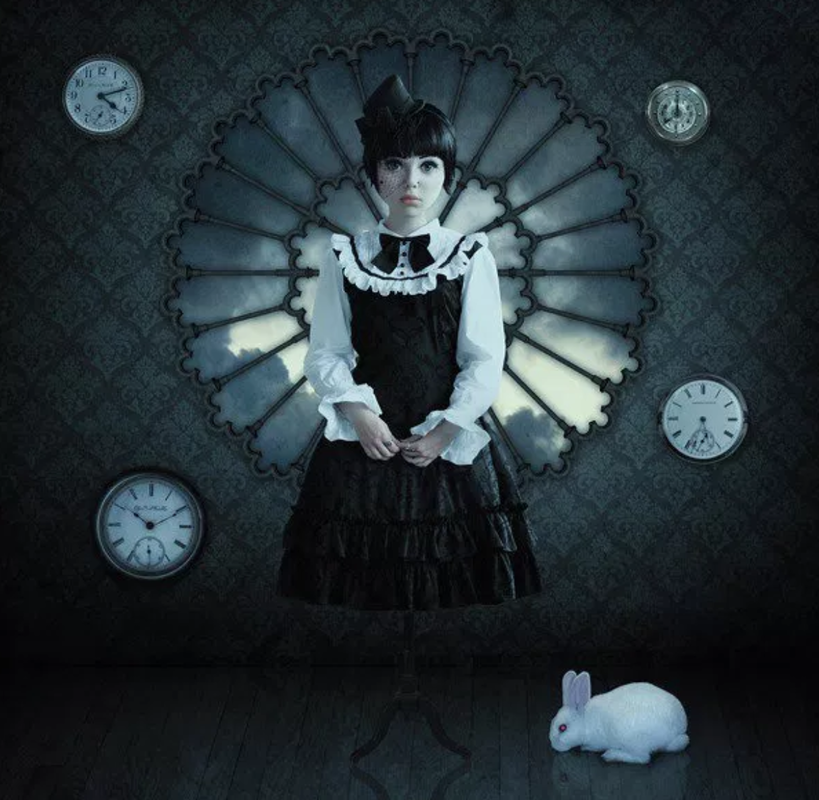
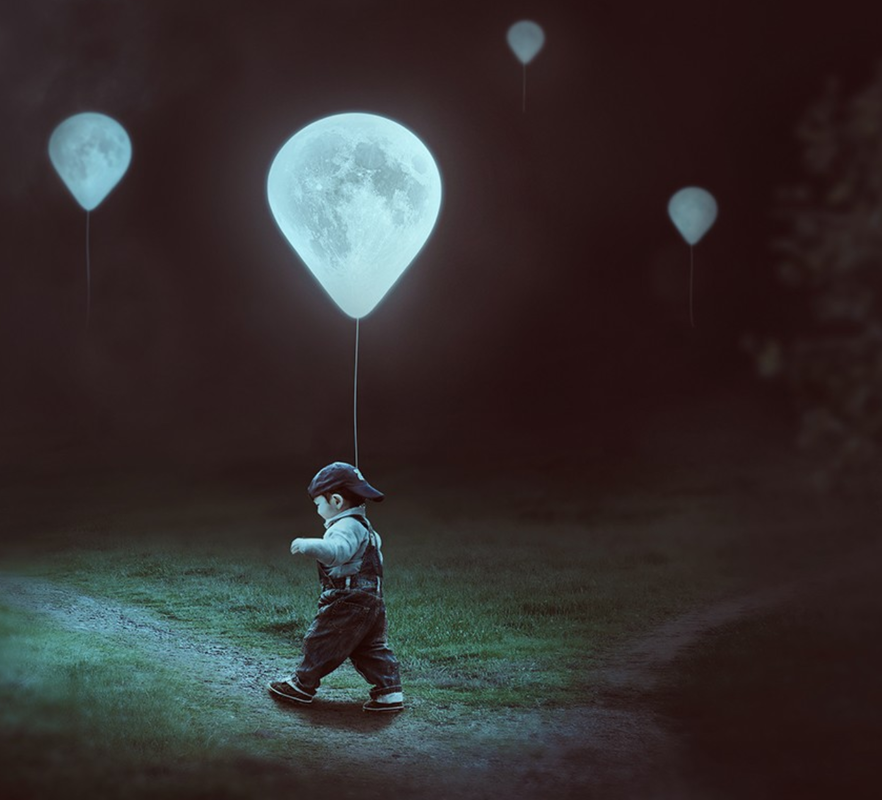
Photoshop Artist-Erik Johansson
Watch both videos about this artist (left video first)
Answer the questions about Erik Johansson either in a word document or in your sketchbook (you will eventually stick these in your sketchbook)
-What do you notice about his method of working?
-What are the steps from idea to execution for his project ideas?
-How does he come up with ideas for his pieces?
-What did you notice about how he collects his images?
-How has being someone who has a drawing background helped him with his Photoshop composites?
-How would you describe her/his style of work? Does his work remind you of something you've seen before?
-What do you find fascinating about her/her work?
-What would you like to learn how to do in Photoshop after seeing his/her work?
|
|
|
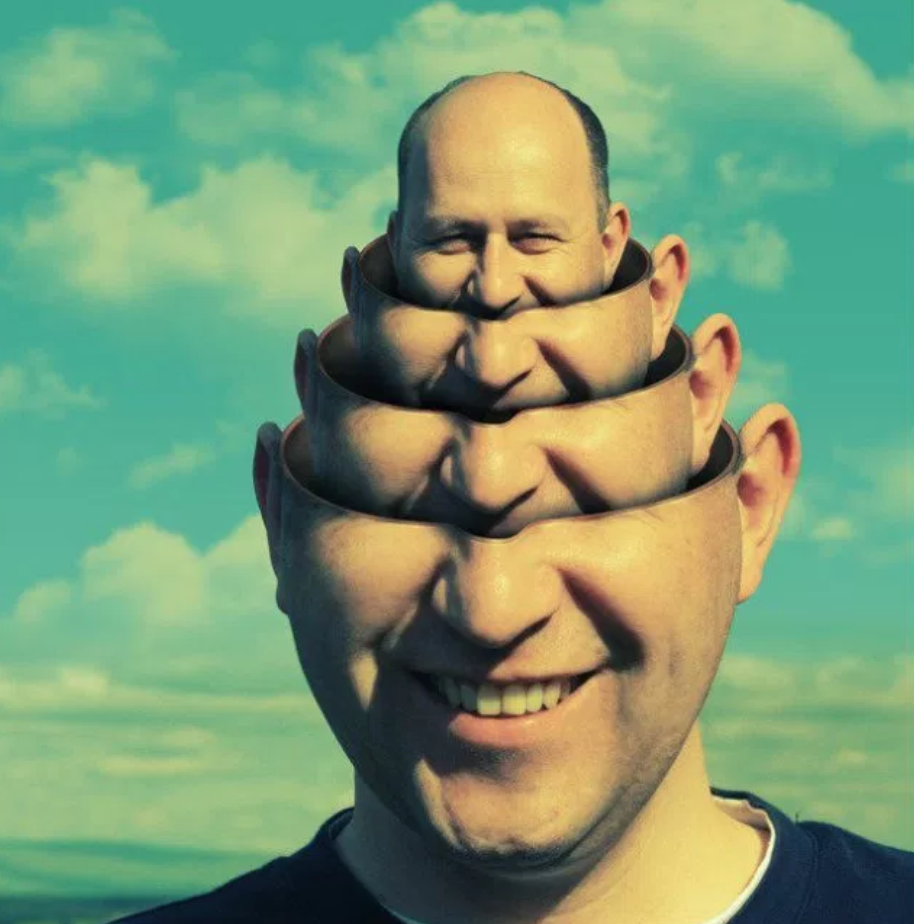
Inception Tutorial
|
The tutorials below are to teach you the Inception effect. On the left is the EASY one and it's to create a tilted effect. If you want to challenge yourself further, do the tutorial on the bottom left first and then try the one on the bottom right. On the right is my attempt doing both tutorials. Easy and really cool visual effect!!!
|
|
|
|
|
Photos for tutorial-Download file below
|
|
| ||||||
Additional Photoshop Tutorials
Click on the photos to take you to tutorial links.
|
|
|
Photoshop Tutorial Channel:
LetsGettoit channel
Homework for THURSDAY/FRIDAY-
Come to class with a clear idea of your subject (person) for the converging cultures project.
You are welcome to have your entire family as the subject or focus on one person.
We will spend class developing our idea!
Come to class with a clear idea of your subject (person) for the converging cultures project.
You are welcome to have your entire family as the subject or focus on one person.
We will spend class developing our idea!
Substitute Day
Monday/Friday
We will play the new Van Gogh movie 'Loving Vincent'.
You have 2 options for this class:
Option 1: Watch the movie and enjoy
Option 2: Wear headphones and do a choice-based Photoshop tutorial (some options below or you can find your own)
Please make sure your BLOG is updated with screenshots posts of all the tutorials we've been doing for Photoshop (check the list above) If you choose to do a tutorial on the sub day, please add a screenshot of it to your blog.
January 15-19
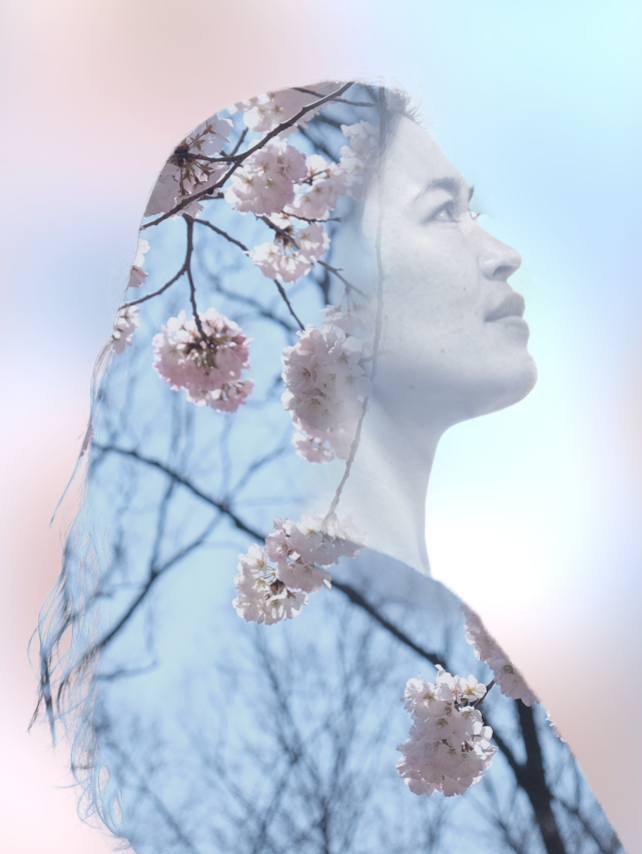
PS Media Testing #4 -Double Exposure
HW-Friday-Double Exposure Practice
|
Link to the Double Exposure Page where there are 2 tutorials on Double Exposure as you scroll down.
The first one is an EASY one and the second one is the more DIFFICULT one that we did in class together. For HW, please try a second double exposure on your own either doing the DIFFICULT tutorial one more time, or following the EASY one-it's up to you! |
|
PS Media Testing #3-Geometric Reflections
Geometric Reflections Tutorial
|
|
|
| ||||||||
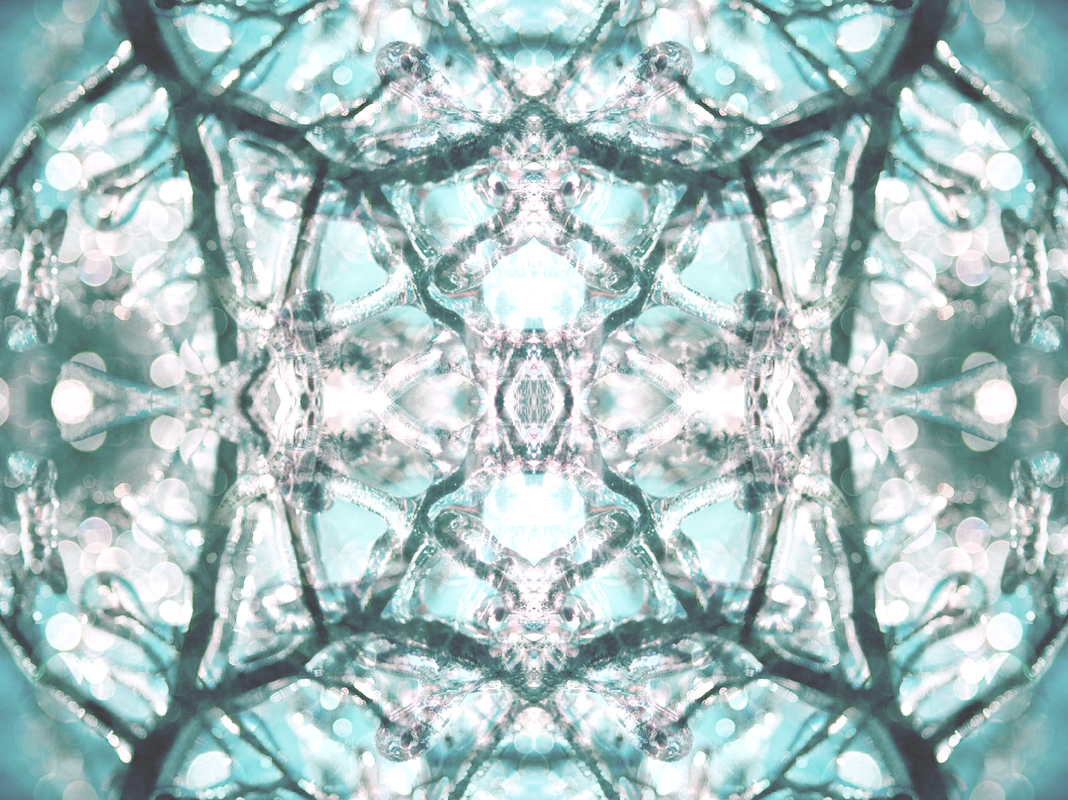
PS Media Testing #2 Kaleidoscope
Photoshop Tutorial-Kaleidoscope using blending modes -Tutorial on our Converging Cultures Page
Use a high resolution image and explore 'blending modes' in the layer dialog box.
Take a screenshot when you are finished and post it on your blog and label as Photoshop Media Testing #2
Use a high resolution image and explore 'blending modes' in the layer dialog box.
Take a screenshot when you are finished and post it on your blog and label as Photoshop Media Testing #2
|
|
|
Sketchbook Assignment-Metamorphosis
1. A transformation, as by magic or sorcery. 2. A marked change in appearance, character, condition, or function. 3. Biology A change in the form and often habits of an animal during normal development after the embryonic stage. Metamorphosis includes, in insects, the transformation of a maggot into an adult fly and a caterpillar into a butterfly and, in amphibians, the changing of a tadpole into a frog. 2 part assignment: Part 1:
|
Medium: Pencil or pen for drawing the metamorphosis sketches. (page 1-grid).USE a RULER TO MAKE YOUR GRID.
Fine tip black pen for outlining the final metamorphosis (page 2). Coloring and shading with color pencils. 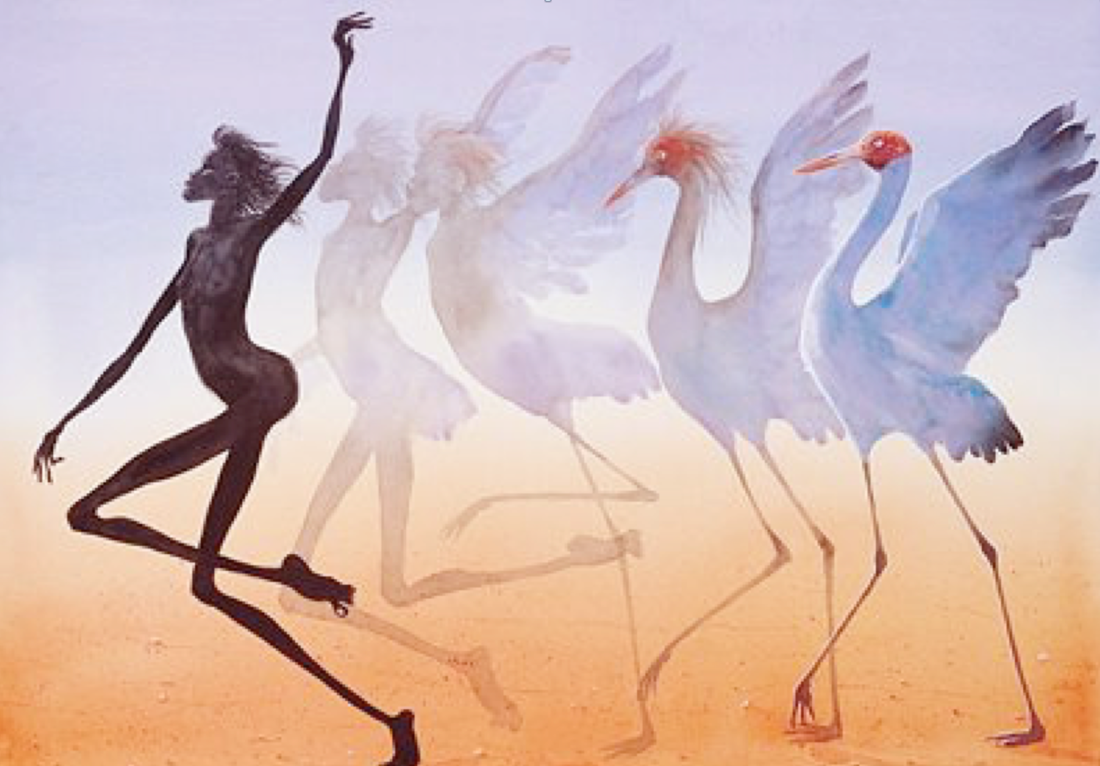
|
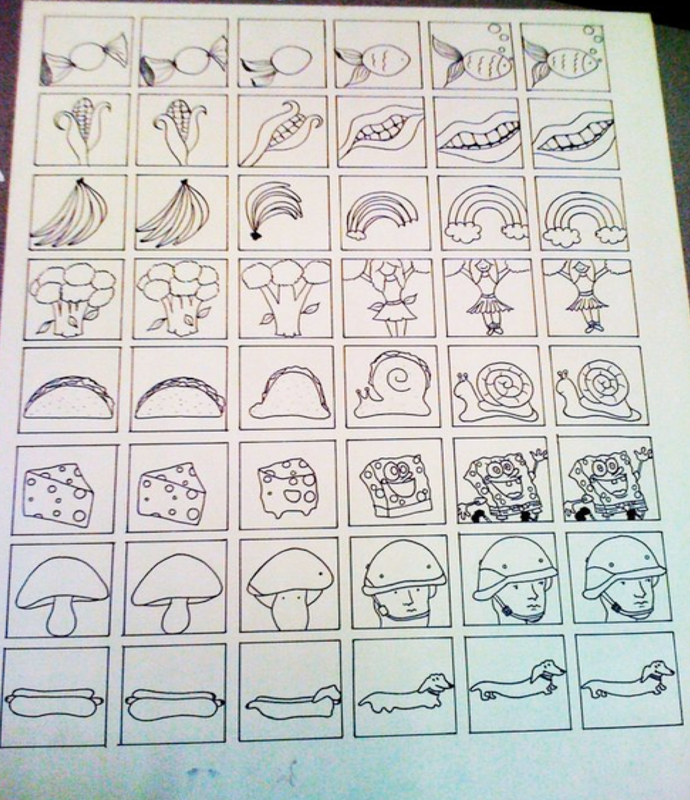
- In this assignment, you will complete 4 metamorphosis of 2 completely different objects in 6 steps. You will then choose your favorite metamorphosis to complete a full page metamorphosis showing 4 steps. For your final drawing, you will condense your 6 steps to 4.
- Each metamorphosis/transformation must go through a total of 6 stages total, from the first object to the second object. (see example photo)
- You may have to use your page in a 'landscape' format rather than a 'portrait' format, to have enough space to fit in all 6 stages.
- You will want to choose objects that are slightly related, for example, a wrapped up candy to a fish. Both the wrapped candy and the fish share the main shape of a circle. (see example photo, the first row)
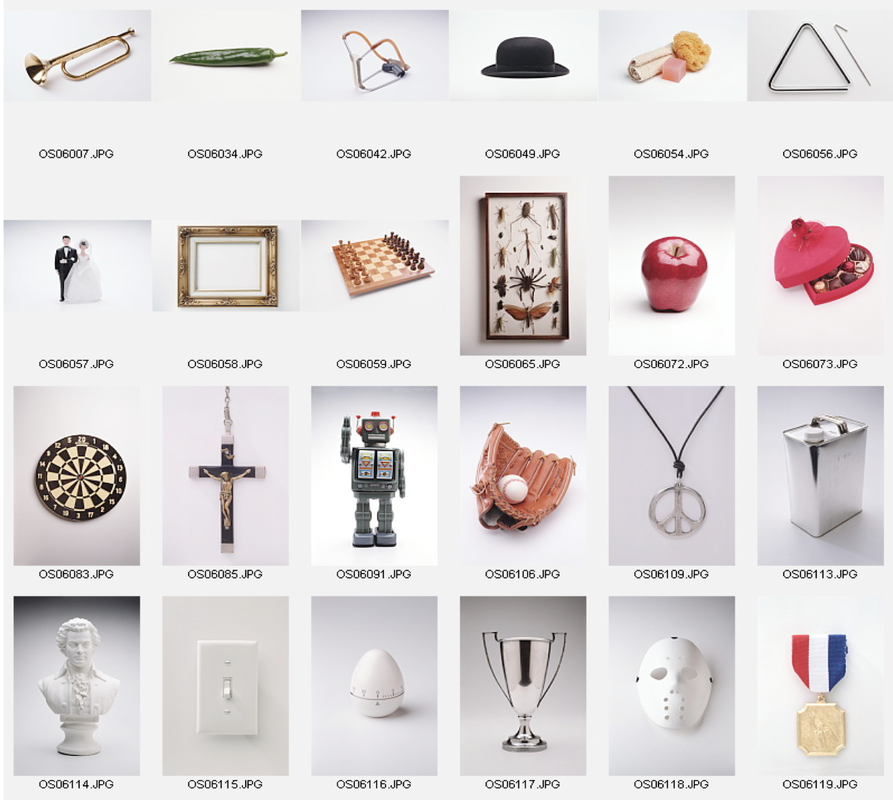
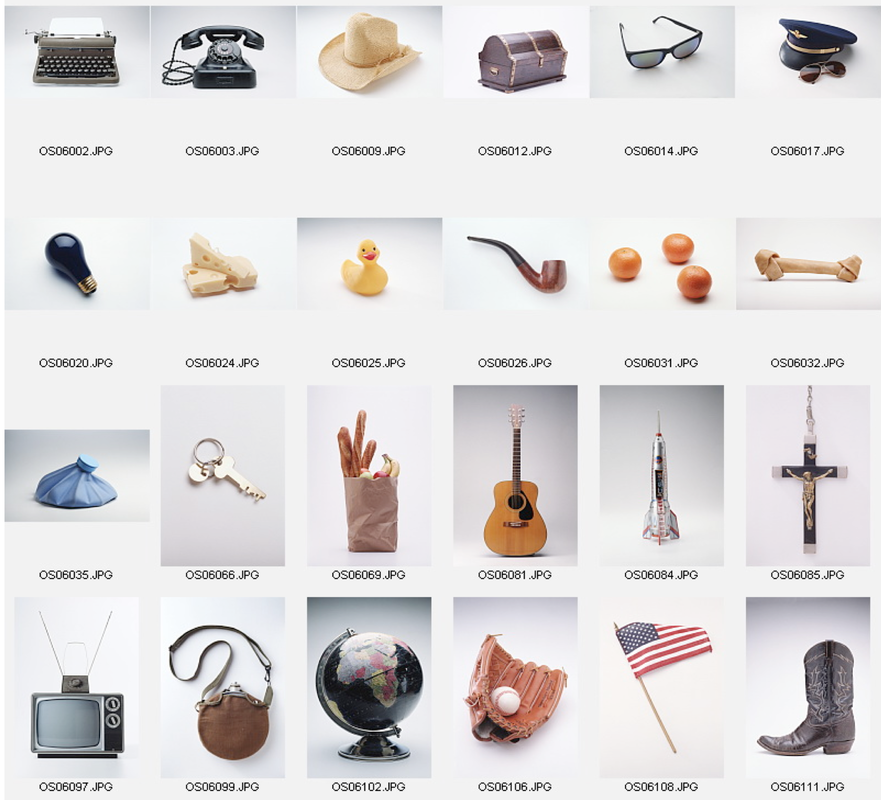
- If you scroll below, you will see some everyday objects to help you come up with objects to pair up for metamorphosis. Of course, you may use other objects that are not displayed below.
January 8-12
NEW UNIT-CONVERGING CULTURES-LINK
PS Media Testing #1- Mr Fruitface
Save your Fruitface as a PSD and take a screenshot to upload to your blog.
Label the Blog Post as 'Photoshop Media Testing'
Label the Blog Post as 'Photoshop Media Testing'
| veggies.zip |
|
Photoshop tools to practice:
-layers -magic wand -quick selection -transform tool/resizing -flip horizontal/vertical -hue/saturation -color balance |
Your composite head must have:
-a head -eyes (iris and pupil), nose (nostrils), lips, (optional: teeth) -eyebrows -hair -ears and maybe earrings -a bowtie or bow -anything else you'd like to add in |
DEC 4-DEC 8
PADLET-Titles for Box Project-Add it here-LINK
WEDNESDAY/THURSDAY- Sketchbooks due! You should have everything in BOLD above in your sketchbook.
Final Written Reflection-In a Box Project
- Your final reflection will be posted as a Blog Post on your ISB blog.
- Your Blog title should be 'In a Box-Title of your piece'
- You should tag your work under ART 1 or make sure it is nested under the Art 1 category on your blog.
- You should organize your writing into paragraphs.
Photos you need on this blog post:
1. Completed project photo with white plain background
2. Final Plan photo
3. Process Photo-1, 2, 3
4. Artist habit of mind 1
5. Artist habit of mind 2
6. Artist habit of mind 3
PART 1: Answer the 3 Introductory prompts at the beginning of your reflection:
1--Introduce the project: Describe the studio challenge. What were you asked to do for this project?
2--Summarize the process of making this work. What did you do first, second, third etc? Did your actual studio piece end up looking differently than you had envisioned in your final plan? What challenges came up for you in this project? How did you address these challenges?
You should embed a photo of the final plan from your sketchbook and 3 process photos of your box project, as well as a FINAL PHOTO of your BOX project (taken with a plain white background)
3--Effort and Artistic Growth: Did you challenge yourself to try out new ideas and techniques in this project? Did you apply yourself to make your best work? Did you take advantage of class time? Looking at your completed work, do you think you've grown and matured as an artist? Explain how and be specific.
PART 2: Choose 3 Artist Habits of Mind (that are DIFFERENT from the ones you chose in your Charcoal project) and address them with written and visual evidence. Look at the Poster below, and check your Charcoal project reflection to make sure you don't repeat any.
For each of the 3 artist habits of mind, you should:
- explain how you have exhibited this habit of mind in your project. Be specific and give an example of how this habit of mind DIRECTLY applies to your work.
- have a photo that directly correlates to how you used this habit of mind.
FINAL PLAN CRITIQUE-Due Wednesday Nov 15
FINAL PLAN CRITIQUE-1 page of final plan in sketchbook
Come to class prepared for a group critique to discuss your final plan for your 'In a Box' project
You should spend 15 minutes AT LEAST sketching out your Final plan on 1 page in your sketchbook.
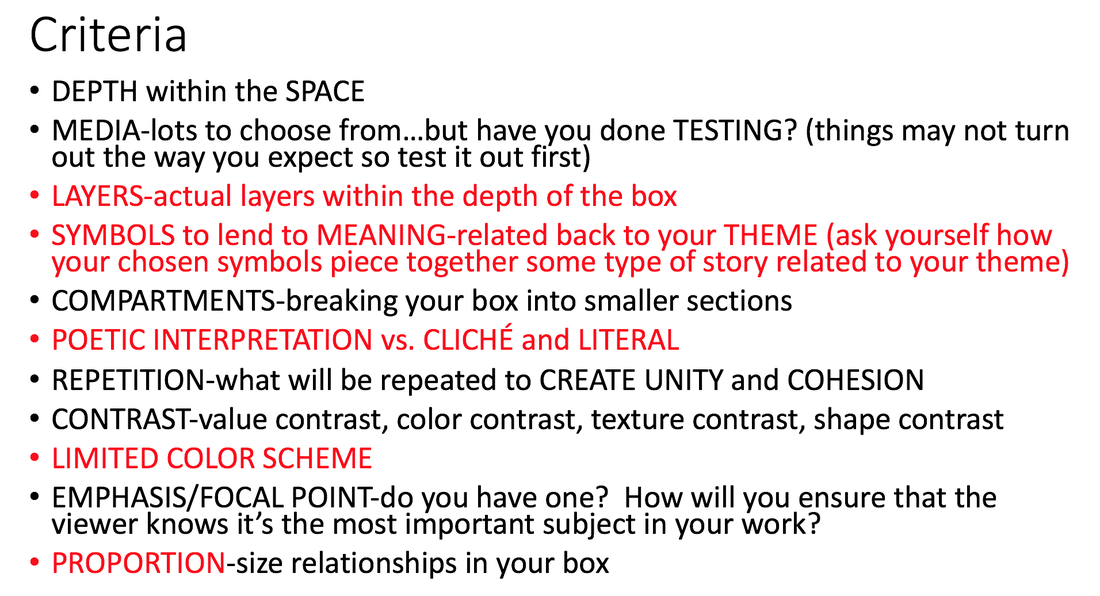
Please be PREPARED to explain how you are utilizing all the pointers in RED
Come to class prepared for a group critique to discuss your final plan for your 'In a Box' project
You should spend 15 minutes AT LEAST sketching out your Final plan on 1 page in your sketchbook.
Please be PREPARED to explain how you are utilizing all the pointers in RED
Due Monday Nov 6
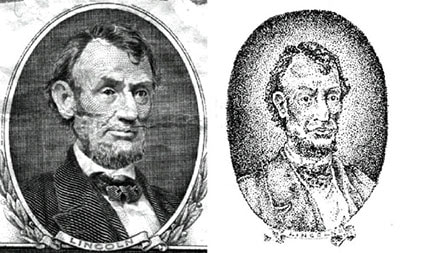
Stipping a close up of a bank note


|
Stipple and Pointillism are essentially the same thing. It is a technique used in art with lots of dots.
Medium: Black pen First, you will complete a stippling value scale in your sketchbook. Draw out your outlines in pencil first using a ruler. You are translating values into little dots. The darker the value, the more dots! The lighter the value, the less dots! A pointillist drawing of a portrait or an image on paper currency (From any country). The drawing should be larger than it is in real life. For example: the portrait should be monumentalized compared to the scale on the bill. When you begin your drawing, you should sketch LIGHTLY with pencil and draw from observation. Try to avoid lines and use dots to do this. Your stippling drawing should be at least 1/4 of an A4 page in your sketchbook. It's smaller in size as it takes longer to do stippling really well! After adding in your stippling values, you can erase the pencil. You may use a VIEWFINDER if you find it helpful to zoom into an area! |
Due Wednesday/Thursday Nov 1 and 2
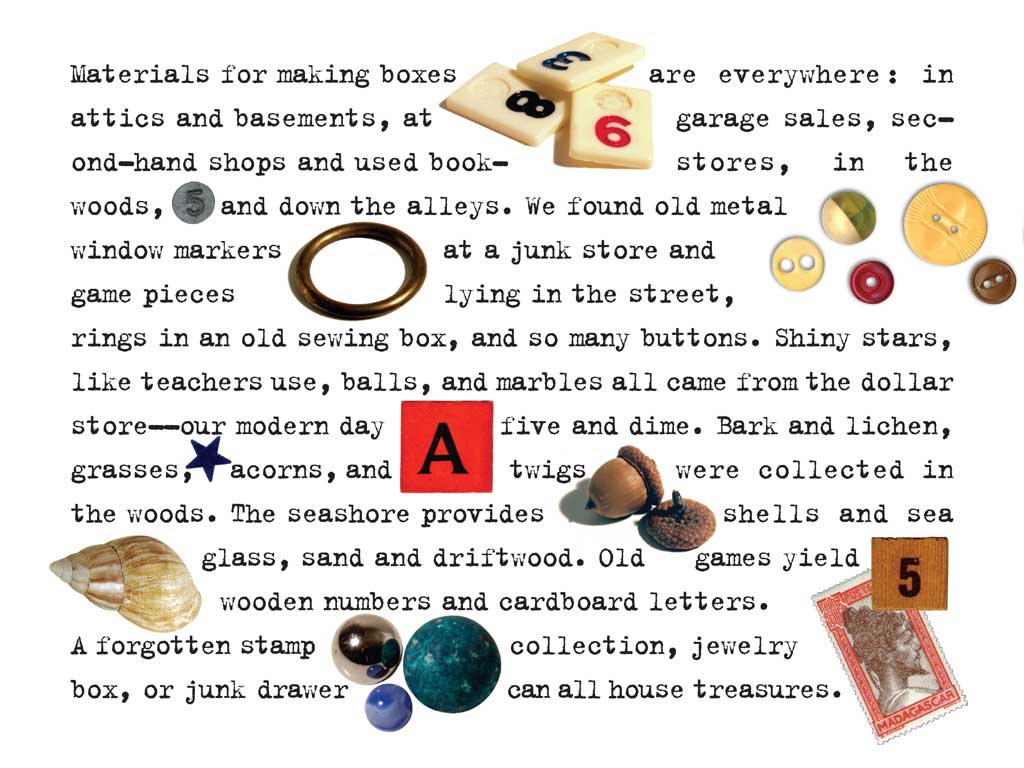
Bring in AT LEAST 3 found objects at home for the IN A BOX project. 2 that you might use for yourself and 1 to contribute to the class box. Look at the image below for ideas!
Due Monday Oct 30
|
Sketchbook Assignment
Magazine cut out drawing Tear out a color magazine image and cut out 50% of the page. You can cut away 1 large section (like in the example to the right) OR small shapes as long as it equals 50% that you've cut away. You should use pencil OR pen to draw the sections you have cut away. You should show VALUE in either your pencil shading, cross-hatching, stippling (little dots) etc. Use a glue stick to glue down the magazine page you will not draw. Keep the parts you have cut away as you will observe each piece carefully to draw them in your sketchbook. All your lines should match up and your drawing and the magazine page image should match up! Enjoy! |
|
-Take your clothes home!
Title Cards for 'You are what you wear' project
Padlet-create a title and a creative explanation for your drawing
-Block E LINK
-Block C LINK
Please check there are no spelling or grammatical errors in your title card write up. Also, please make sure you are writing in complete sentences.
Title Cards for 'You are what you wear' project
Padlet-create a title and a creative explanation for your drawing
-Block E LINK
-Block C LINK
Please check there are no spelling or grammatical errors in your title card write up. Also, please make sure you are writing in complete sentences.
Due Wed and Thurs 25 Oct/ 26 Oct
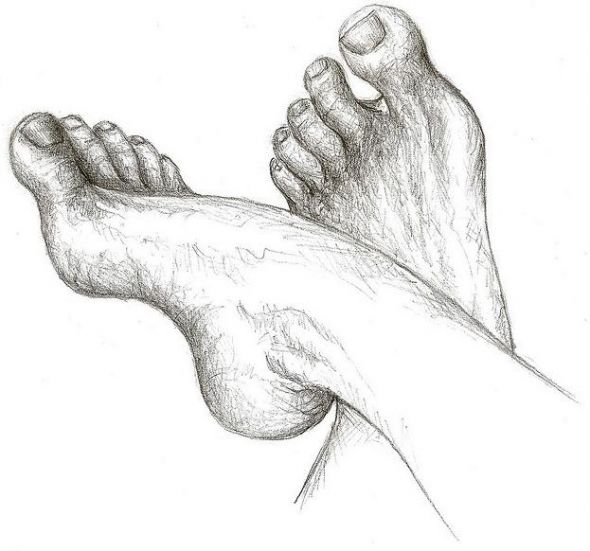
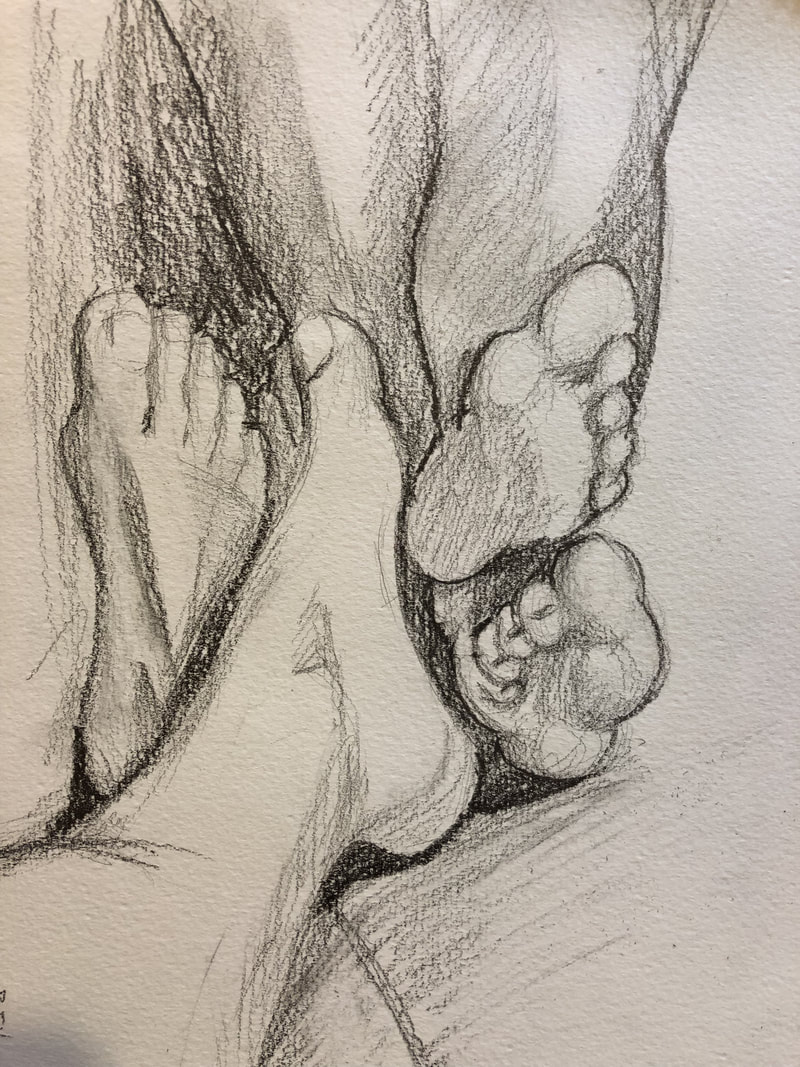
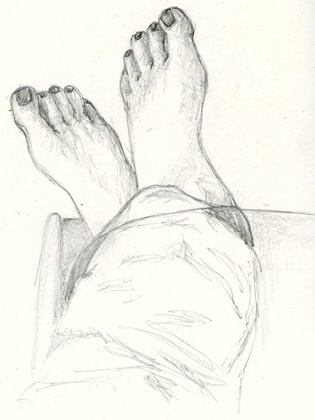
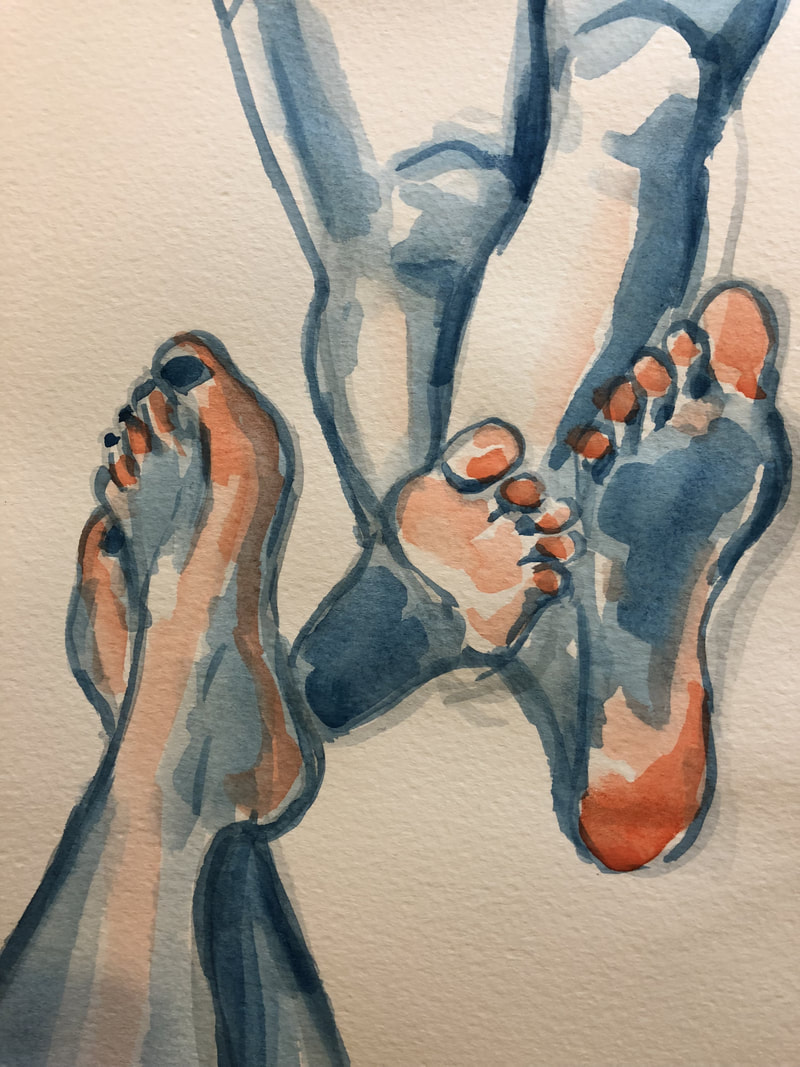
Draw your feet from observation-spend 1 hour drawing your BARE FEET
Use any media you choose-pencil, pen, color pencil, watercolors, oil pastel.
The main thing i am looking for is that you are practicing your use of proportion of form and value.
Use any media you choose-pencil, pen, color pencil, watercolors, oil pastel.
The main thing i am looking for is that you are practicing your use of proportion of form and value.
|
|
Week 8-October 9-13
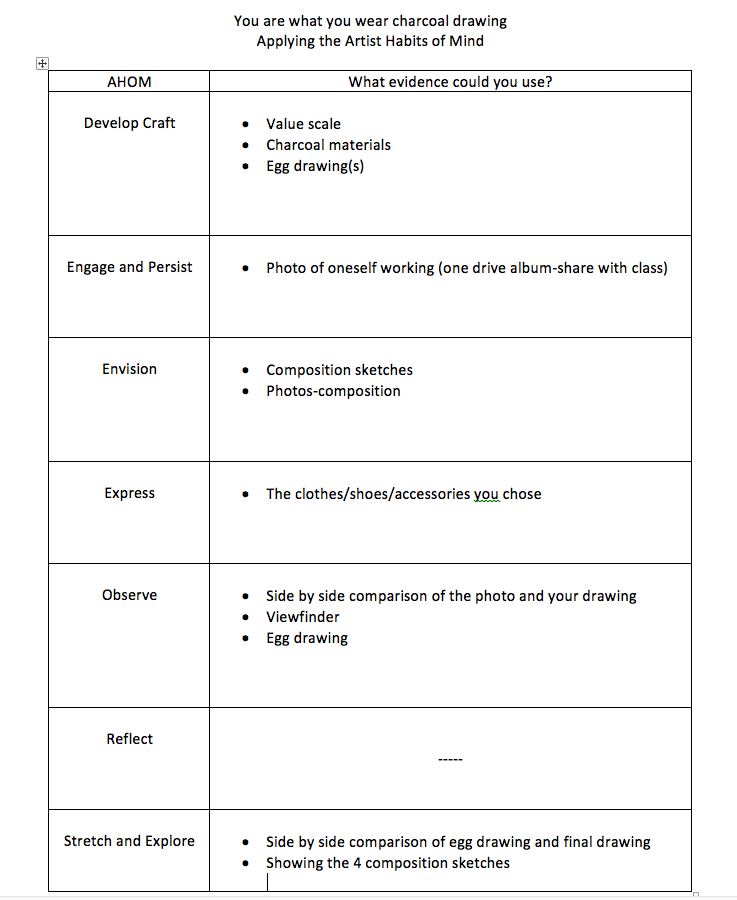
Reflection-You are what you wear charcoal drawing
We will use the 8 Artist Habits of Mind to write up our first formal reflection. But first, let's learn about the artist habits of mind in the video below.
Reflection Requirements
Large photo of your completed drawing (photo should be edited-cropped, straightened and clear)
At least 4 photos:
-1 of completed drawing
-3 photos to support each of the 3 artist habits of mind you chose
Answer the 3 Introductory prompts at the beginning of your reflection:
--Introduce the project: Describe the studio challenge. What were you asked to do?
--Summarize the process of making this work. What did you do first, second, third etc? Did your actual studio piece end up looking differently than you had envisioned? What challenges came up for you in this project? How did you address these challenges?
--Effort and Artistic Growth: Did you challenge yourself to try out new ideas and techniques in this project? Did you apply yourself to make your best work? Did you take advantage of class time? Looking at your completed work, do you think you've grown and matured as an artist? Please explain.
Choose 3 artist habits of mind and dedicate a short paragraph to each.
BOLD the artist habit of mind when you mention it in your paragraph.
Include a piece of photo evidence and written evidence of HOW you used this habit of mind in this project.
Photos of students working
OCTOBER BREAK HOMEWORK!
Over the break, you should do 2 hours of CREATIVE ARTSY work. It can be whatever you want: doodling, sketching from imagination, sketching from observation, photography, hand lettering, digital art, magazine collage etc. There's nothing you can't do, as long as it's artsy in some way.
As I will have your sketchbooks here in class, please take a photo(s) of your free choice artwork to share with the class.
Please take a look at this page for some inspiring ideas-LINK
As I will have your sketchbooks here in class, please take a photo(s) of your free choice artwork to share with the class.
Please take a look at this page for some inspiring ideas-LINK
Week 7- September 25-29
Due Wednesday, Sept 27
Turn in Sketchbook and Fast/Slow Blog Post
Sketchbook Formative Check:
1. Time Capsule
2. 1 object/9 times
3. Composition Still Life
4. Charcoal Value Scale
5. Photos of egg drawing-1 and 2
6. Composition sketches of still life clothes
7. Original Butterfly
ISB Blog Post #1 - Finish FAST/SLOW Rickshaw drawing and take a photo of it in good lighting.
Your blog post should consist of:
1. a clear and well exposed photo of the completed drawing
2. a written reflection following the questions/prompts listed below.
Make sure you create a category called ART 1 on your ISB blog so it's easy to find your Art 1 posts.
Questions/prompts to be addressed in the writing of your reflection:
-Introduce the assignment. What 2 types of drawing were you able to practice in this assignment (GESTURAL AND CONTINUOUS CONTOUR LINE).
-In your own words, define gestural drawing and continuous contour line drawing. How are these types of drawing different from one another?
-Explain how you approached this assignment. What art media/materials did you use to do this? What sequence did you follow in doing this assignment?
-If someone was doing this assignment for the first time, what pointers or tips would you give them to help them be more successful?
-What did you find challenging about this assignment? Be specific.
-What did you learn by doing this assignment? Be specific.
Week 6-September 18-22
Week 4-September 4-8
Tuesday Sept 5
Today:
-finish composition sketches of clothes still life. You should have 4 composition sketches in your sketchbook. 2 per page. no more than 10 minutes per sketch. 5 minutes should be enough.
-group share
each person in the group take turns will present their composition sketches explaining WHAT they wanted to focus on compositionally in each of the sketches:
-leading/diagonal lines
-positive and negative space
-balance-symmetrical or asymmetrical
-focal point
-zoom in
-group members should tell the person explaining/showing their sketches to the group which composition is most visually interesting to them and WHY.
-Edit your final photo that you will use for your drawing. You may use Preview or Photos on your laptop to edit.
-Make the photo black and white and adjust contrast, shadow and highlights to bring out a range of values.
-Crop the photo a little bit only if you think it will strengthen the composition, but stick to the rectangle format (portrait or landscape orientation)
-Print out your photo on A4 paper, black and white. Print full size so the photo fills the A4 paper.
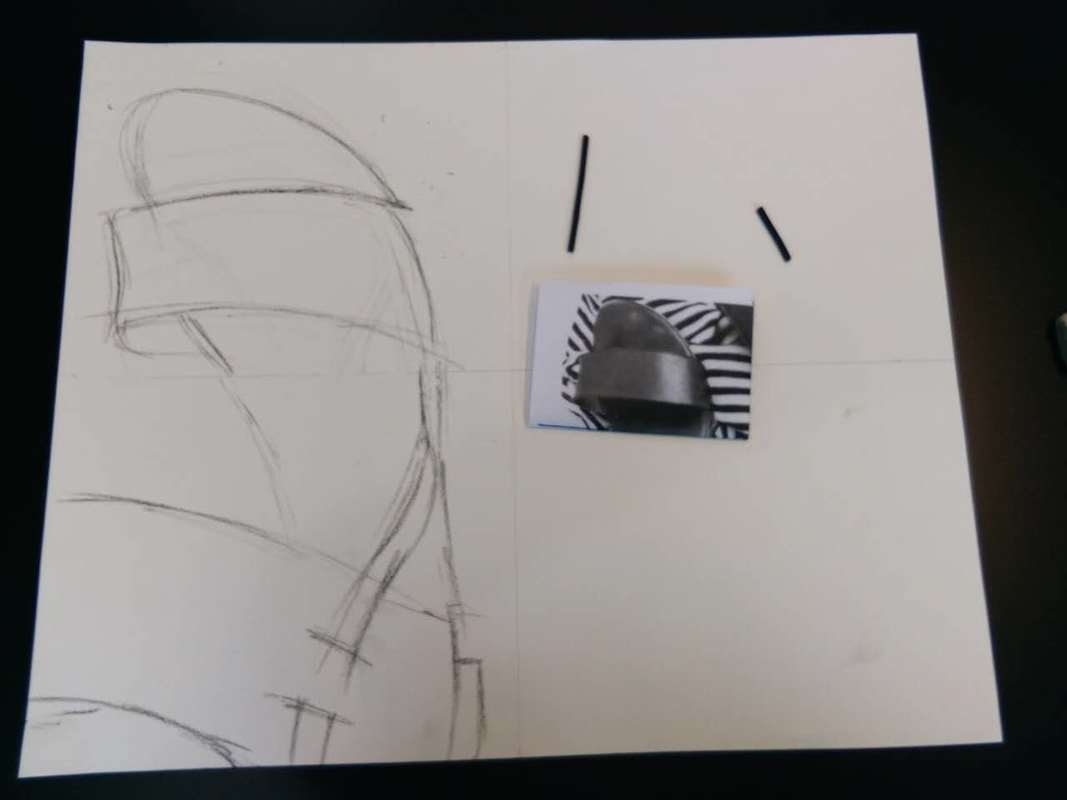
-With ruler and pencil grid your printed photo into 4 equal quadrants. Go over your pencil line with marker so the line stands out more prominently.
-With a ruler and a pencil, VERY LIGHTLY grid your large drawing paper into 4 equal quadrants. I stress on making your lines light because we will erase them later and if you press hard it will be difficult to erase.
-With VINE CHARCOAL, begin lightly sketching out your largest shapes on your drawing paper. I folded the photo by quadrants so i was only looking at 1 quadrant at a time to draw.
Map out all your shapes on the paper.
The photos below illustrate my grid directions.
Today:
-finish composition sketches of clothes still life. You should have 4 composition sketches in your sketchbook. 2 per page. no more than 10 minutes per sketch. 5 minutes should be enough.
-group share
each person in the group take turns will present their composition sketches explaining WHAT they wanted to focus on compositionally in each of the sketches:
-leading/diagonal lines
-positive and negative space
-balance-symmetrical or asymmetrical
-focal point
-zoom in
-group members should tell the person explaining/showing their sketches to the group which composition is most visually interesting to them and WHY.
-Edit your final photo that you will use for your drawing. You may use Preview or Photos on your laptop to edit.
-Make the photo black and white and adjust contrast, shadow and highlights to bring out a range of values.
-Crop the photo a little bit only if you think it will strengthen the composition, but stick to the rectangle format (portrait or landscape orientation)
-Print out your photo on A4 paper, black and white. Print full size so the photo fills the A4 paper.
-With ruler and pencil grid your printed photo into 4 equal quadrants. Go over your pencil line with marker so the line stands out more prominently.
-With a ruler and a pencil, VERY LIGHTLY grid your large drawing paper into 4 equal quadrants. I stress on making your lines light because we will erase them later and if you press hard it will be difficult to erase.
-With VINE CHARCOAL, begin lightly sketching out your largest shapes on your drawing paper. I folded the photo by quadrants so i was only looking at 1 quadrant at a time to draw.
Map out all your shapes on the paper.
The photos below illustrate my grid directions.

Week 3-August 28-Sept 1
Due Monday Sept 4/Tuesday Sept 5
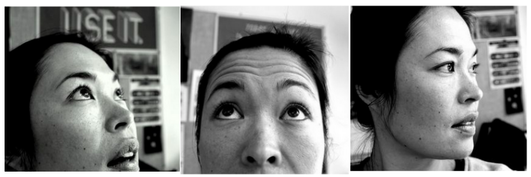
Eye Photos for the joint project we will create with Kate Kern
Take at least 3 photos of your own eyes, and then take a few photos of the eyes of your family members if you can.
My examples are below. All I did was crop the photos, make them black and white and increase contrast.
Eye Photos for the joint project we will create with Kate Kern
Take at least 3 photos of your own eyes, and then take a few photos of the eyes of your family members if you can.
My examples are below. All I did was crop the photos, make them black and white and increase contrast.


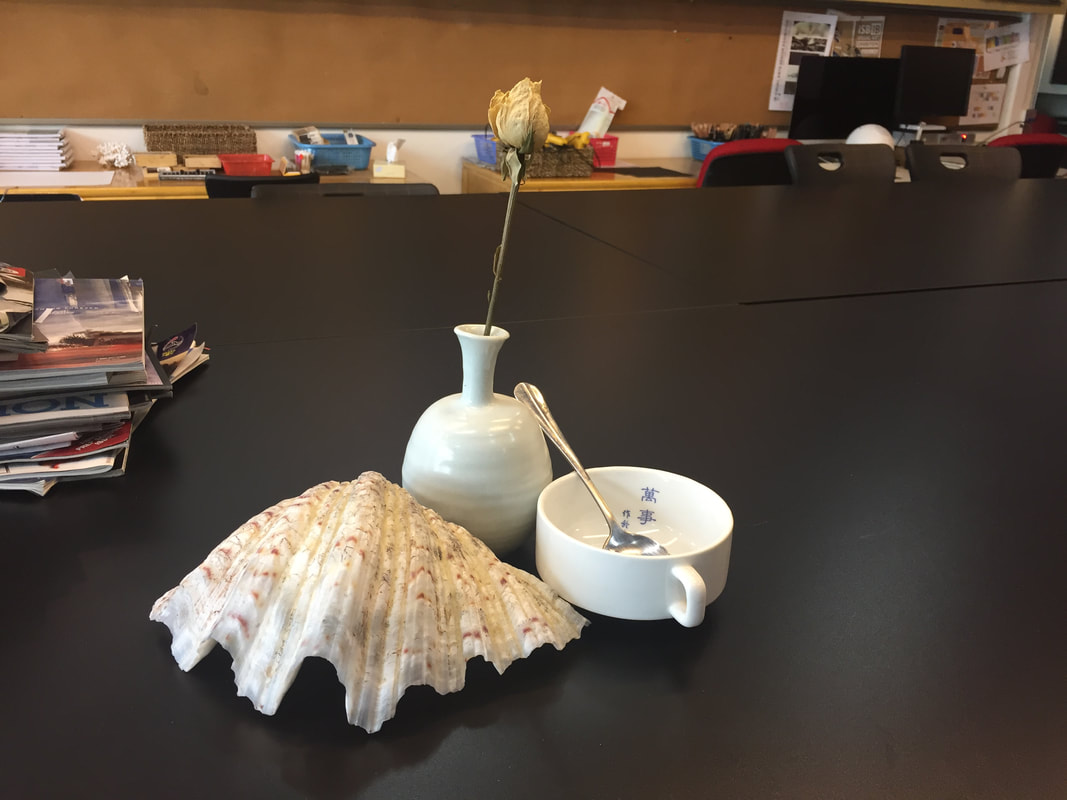
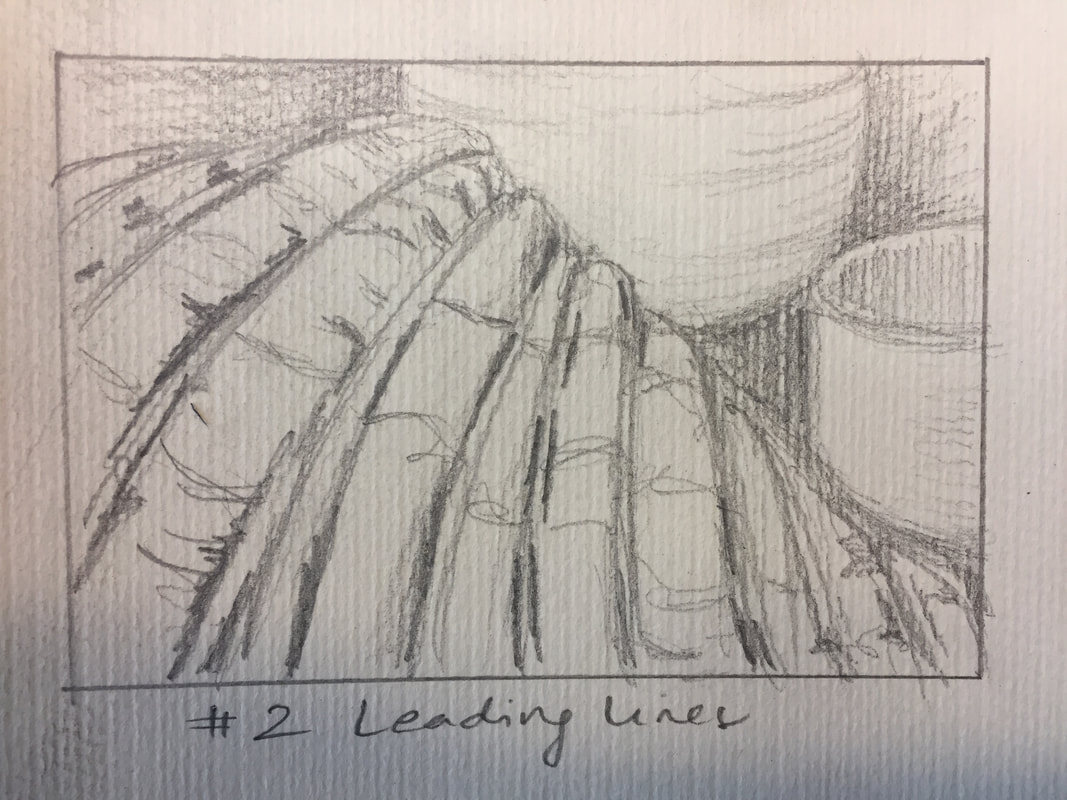
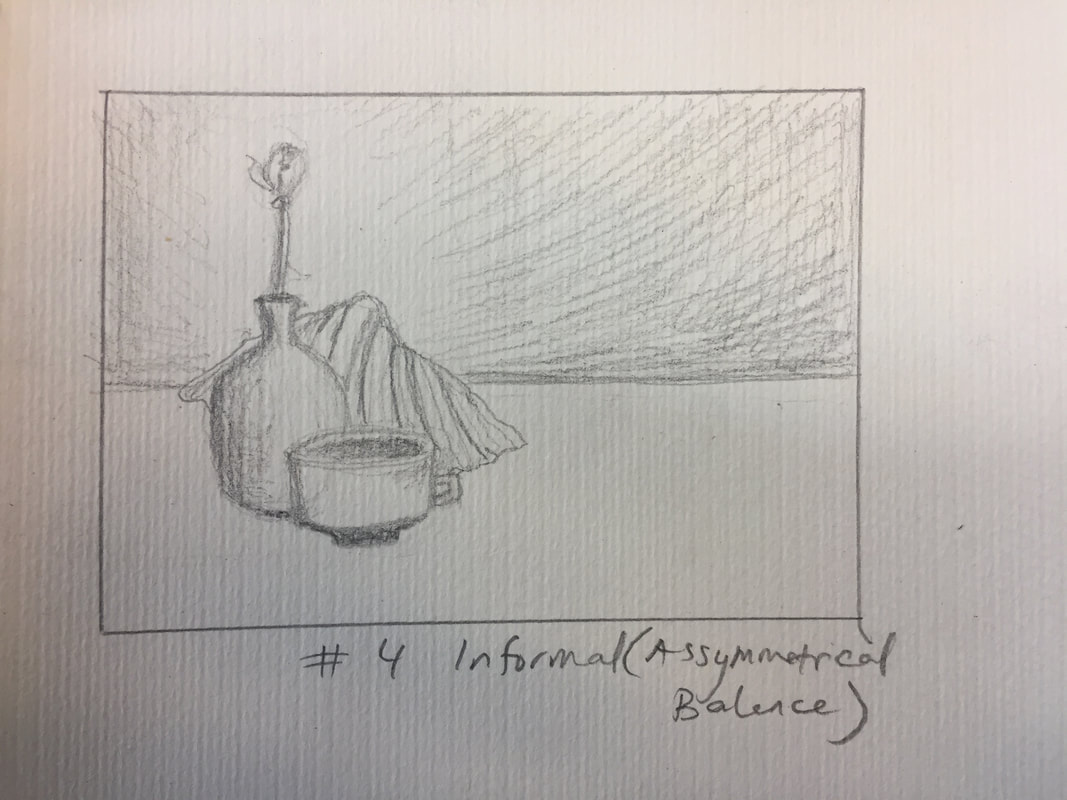
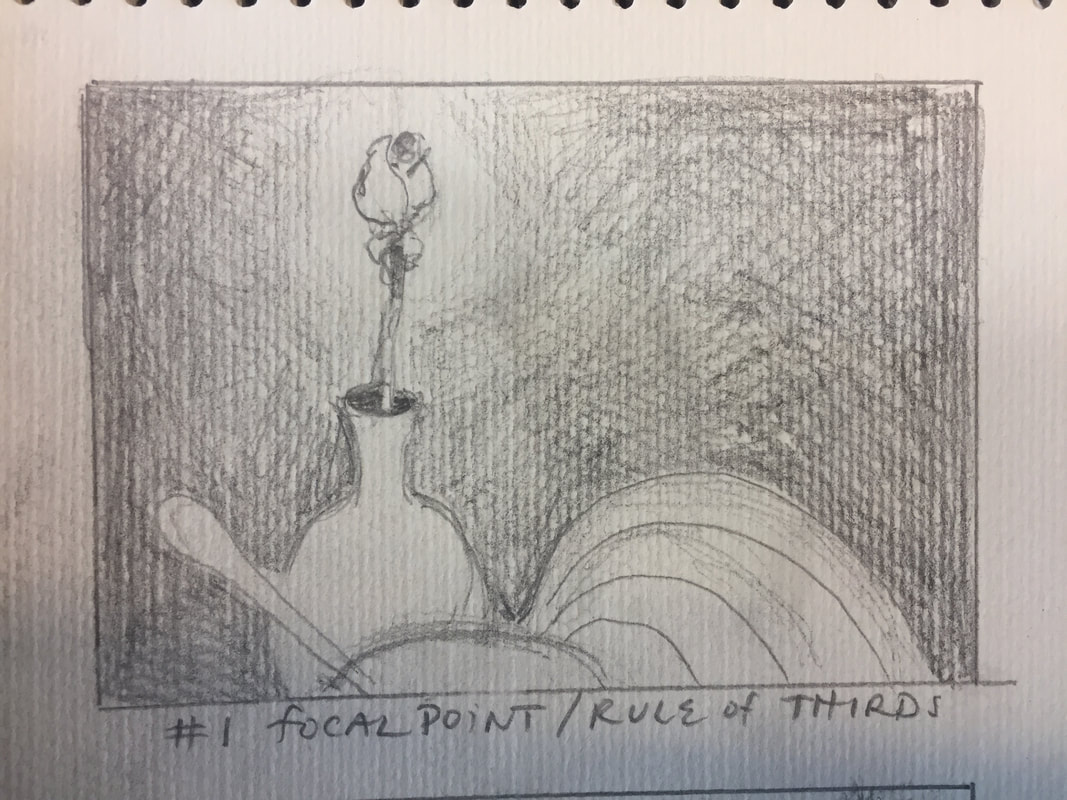
Sketchbook Assignment-Exploring Composition in Drawings
Composition Prezi from class-LINK
Set up a still life at home with 3-5 objects on a table. Light source will help but it's not terribly important. IF you are a beginning drawer, choose simple objects.
Composition Prezi from class-LINK
Set up a still life at home with 3-5 objects on a table. Light source will help but it's not terribly important. IF you are a beginning drawer, choose simple objects.
|
You will use the paper viewfinder and create 4 different composition sketches on 2 pages (2 sketches per page) in your sketchbook.
Use pencil and limit yourself to 10 minutes per sketch. Remember, composition is organizing shapes within the frame. You may work with a LANDSCAPE orientation and/or a PORTRAIT orientation. Up to you! Sketch #1: have a distinct focal point. it should fall on one of the rule of thirds lines. Sketch #2: Leading lines/diagonal lines Sketch#3: Zoom in Sketch#4: Create a composition with informal (asymmetrical) balance |
|
|

|
Week 2-August 21-25
|
Due Thursday August 24 /Friday August 25
SKETCHBOOK-1 Object 9 times-Composition Exercise Divide your sketchbook page into 9 EQUAL square segments-use a RULER. It will look better if you follow the layout in the example. Choose a random object at home that has an interesting outer shape. Basically no rectangles or squares or circles...there should be some unique outer edge to this object. Look at the object from a VARIETY of ANGLES (top, bottom, left, right, side). ZOOM IN and OUT, with your eyes. Think about BALANCE between positive and negative space. Where will you place the visual weight? Left, Right or Center? Top or bottom? Will the object go off the frame? Will you orient your object at a diagonal? You decide. Just make sure EACH of the 9 sketches is different. Media: black fine tip pen and sharpie to fill in areas to create CONTRAST between the positive and negative space. |
|
Due Monday August 21 /Tuesday August 22
1. 4 items of clothing
2. Selfie with 1 strong light source (create highlights and shadows on the face)
1. Bring in 4 items of clothing that DEFINE YOU! The older and more beat up the clothes, the better. shoes, socks, belt, pants, shirt etc. You will keep these items in the classroom for 1 week.
2. Take a selfie of your whole face and set up a strong light source on one side of your face. You want to ensure you have highlights, midtones and shadows on your face.
Due August 21/August 22
First sketchbook Assignment-The Time Capsule
Divide a sketchbook page into 4 quadrants with a ruler
Time: Limit yourself to 15 minutes per quadrant sketch (so the assignment should take no more than 1 hour)
Media: Use a pencil for this assignment
Purpose: to take a snapshot of your drawing skills at the beginning of the year
1 page in sketchbook, 4 quadrants
Draw:
1. your hand holding something special
2. a corner of a room
3. your face (look in a mirror or take a selfie and try to draw from that)
4. draw a complex object that you find in your house
Week 1-August 14-18
Fast/Slow Drawing
4 small drawings
-1 large drawing-rickshaw
Monday August 14
Beginning of the year survey-please fill out
Create your ISB Blog
Make sure to create a category titled ART 1, and all your art related posts will be nested under this category.
Add your personal ISB Blog URL to
Block A padlet
Block E padlet